You're on a wet evening drive, the dash suddenly throws a battery light, and the headlights don't look quite as sharp as they did ten minutes ago. The car may still be running, but that uneasy feeling is real, because charging system faults often show up exactly like that, halfway home and never at a convenient time. In many cases, the alternator is the part doing the heavy lifting in the background, keeping the battery charged and the electrical system alive while you drive.

A factory-installed alternator doesn't last forever. Under normal UK driving conditions, you can typically expect a service life of around 80,000 to 150,000 miles, or roughly 7 to 12 years. That lifespan explains why alternator replacement often shows up as an age-and-mileage repair rather than a routine service item, and why it catches drivers off guard just when they thought the car was otherwise fine. Labour time and access matter just as much as the part itself, because some alternators are straightforward to reach and others are buried behind covers, belts, or tight engine bay packaging.
That Flickering Light on Your Dashboard
The first clue is often the least dramatic. A battery warning light comes on, the cabin lights dip at idle, or the radio starts behaving oddly on a damp commute when the engine bay is under load. Those symptoms don't automatically mean the alternator has failed, but they do mean the charging system needs attention before you keep driving and hope it sorts itself out.
A healthy alternator does more than “charge the battery”. It keeps the battery topped up after starting, and it supplies power to the vehicle's electrical system while the engine is running. That matters more on modern cars than it used to, because there's more to feed, from control modules to heated screens and other electrical loads.
Practical rule: if the battery light appears together with dimming lights or weird electrical behaviour, treat it as a charging-system problem, not just a battery problem.
Why the age of the unit matters
Alternators don't fail on a neat timetable, but age and mileage do tell you a lot. Once a unit has been in service for years, wear in bearings, brushes, regulators, or internal connections can turn a marginal system into an obvious fault. That's why a car can seem fine one week, then suddenly start showing warning signs the next.
The important thing for a DIYer is not to guess too early. A battery can be weak, a belt can be slipping, or a terminal can be corroded, and all three can mimic alternator trouble. If you jump straight to replacement without checking the basics, you risk buying an expensive part you didn't need.
That's the pattern I'd expect most capable DIY owners to face. The symptoms show up first, the car still moves under its own power, and the temptation is to order the obvious part immediately. Resist that urge until the charging system has been checked properly.
Is It Really the Alternator? Key Pre-Replacement Checks
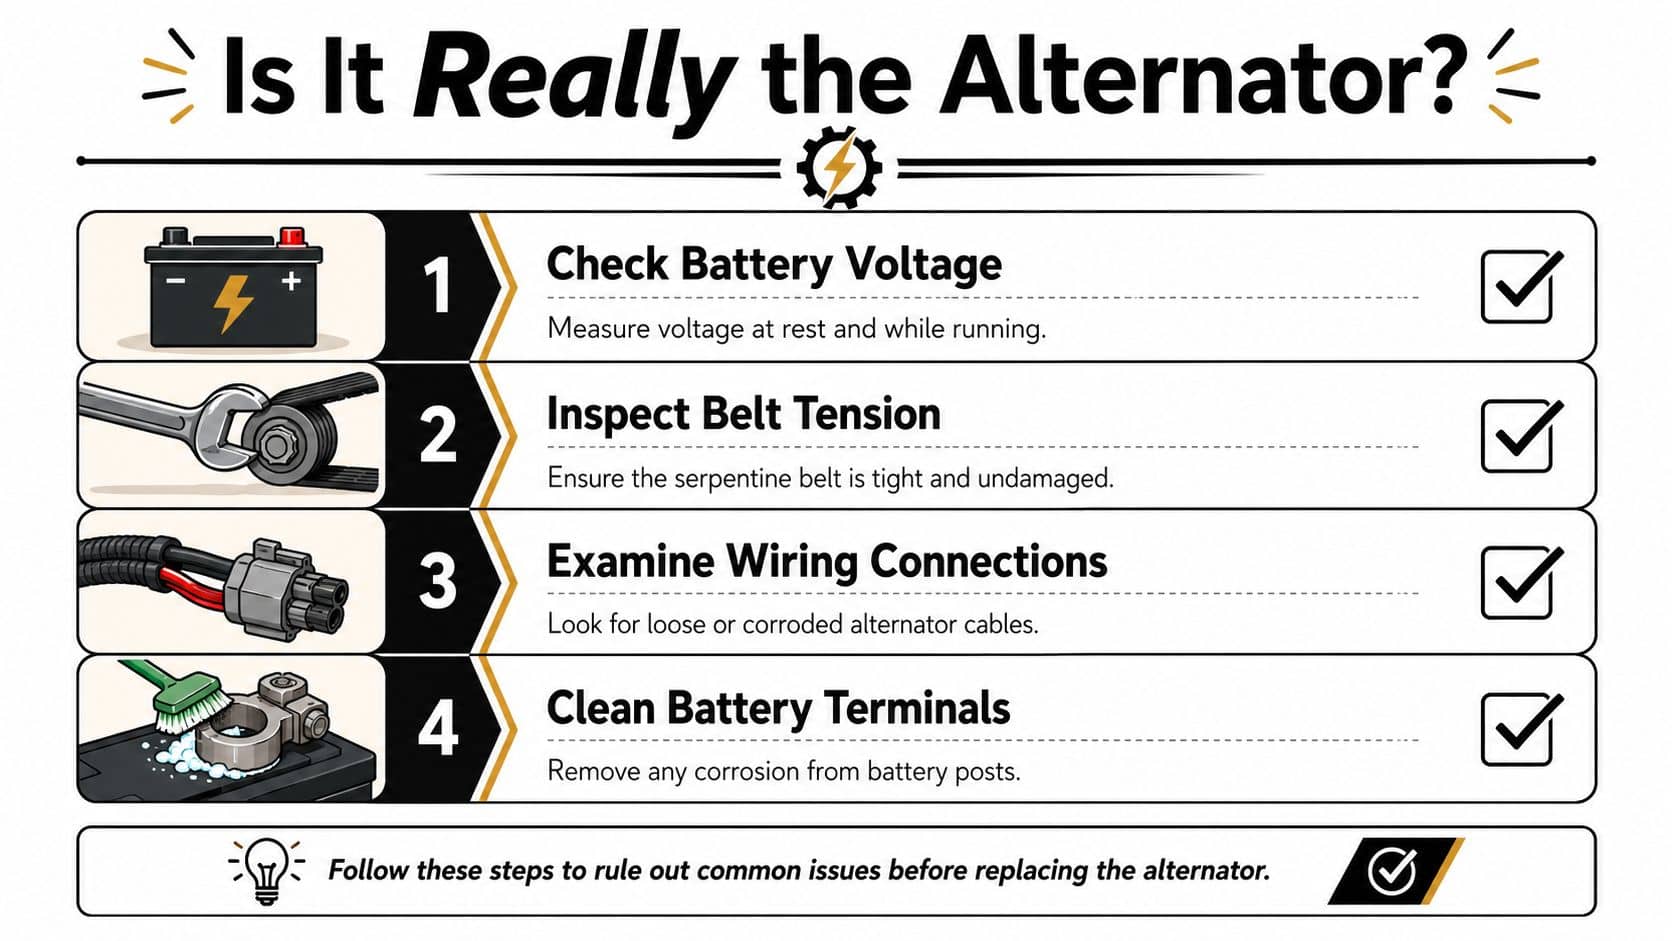
Before you spend money on a new unit, treat the job like diagnosis, not parts swapping. A weak battery, corroded terminal, broken cable, blown fuse, poor belt tension, or bad connection can all produce the same rough symptoms. Check those basics first, because the fault is often simpler and cheaper than the alternator itself.
Start with the battery and its connections
A battery that's already weak can make the alternator look guilty. Check the battery terminals for corrosion, looseness, or damaged clamps, and make sure the connections are clean and secure. If you're using a multimeter, look for a sensible resting voltage before you start blaming the charging side.
If the battery has been going flat repeatedly, do not assume the alternator is the only possible culprit. A battery that's near the end of its life can hide a charging fault, and a charging fault can also damage a battery that was otherwise usable. Diagnosis has to be done in order, not by instinct.
Check the belt, wiring, and fuses
The alternator can only do its job if it is being driven correctly and connected correctly. Inspect the belt condition and tension, then look over the charging wires, the alternator plug, and any accessible fuses or fusible links.
A loose or glazed belt can let the alternator spin without producing stable output. Corrosion on the battery posts or a tired ground connection can also interrupt current flow and create the kind of erratic electrical behaviour that sends people straight to the parts counter. Fix the cheap external fault first if you find one.
Use the multimeter before you commit
A running-voltage test is the cleanest reality check for a DIY owner. With the engine running, a healthy charging system typically reads around 13.5 to 14.5 V at the battery terminals. If the reading is well outside that range, or changes badly with electrical load, you've got a reason to dig deeper.
A proper diagnosis saves more money than any discount on parts.
If you've ruled out battery, terminals, belt, wiring, and fuses, you're in much better shape to buy the right alternator with confidence. If not, pause there and sort the fault first. For charging-system support items while you're diagnosing, see this battery charger option.
Sourcing the Right Alternator and Tools from GSF Car Parts
The hard part is often not the spanner work, it is getting the exact alternator that fits your car. A description like “Ford Focus alternator” is too vague for modern vehicles, especially those with start-stop systems, because one model can use several variants with different amperage, connector positions, pulley types, and mounting layouts. A VIN or number-plate lookup is the safer route, because it narrows the part to the car you own, not just the badge on the boot.

Match the alternator before you order it
Lay the old unit next to the listing photo if you can, then check the mounting ears, pulley alignment, connector shape, and output spec. The goal is a direct fit, not a “close enough” part that creates compromises during installation. That matters even more on newer cars, where the wrong alternator can cause undercharging, warning lights, or a fitment problem that wastes the whole afternoon.
If you are buying through GSF Car Parts, use the number plate finder first, then confirm the part details before you add it to the basket. GSF also lists alternator options on its dedicated alternator parts page, which is the right place to compare fitment data rather than relying on guesswork. For urgent jobs, Click & Collect can save a delay, and the minimum 12-month warranty gives some breathing room if you are fitting the part yourself.
A second check at this stage is worth the time. Compare the pulley type, the casing shape, and the position of the electrical plug against the unit that came off the car, because small differences can stop the alternator sitting correctly or make the belt run out of line.
Gather the tools before you start
Do not strip the front of the engine bay before checking your kit. At minimum, you want a decent socket set, the right spanners, and a belt tensioner tool if the pulley layout needs one. The job often goes more smoothly if you also have a torch, gloves, and a small tray for bolts.
A practical shopping list keeps the job moving:
Socket set and extensions: useful for awkward lower bolts and bracket fixings.
Spanners: handy where a socket will not sit squarely on a tight fastener.
Serpentine belt tool or breaker bar: makes tensioner movement safer and smoother.
Multimeter: needed for the final charging check, not just diagnosis.
Marker or phone camera: helps you record belt routing and connector positions before removal.
I would also lay the old alternator on the bench before fitting the new one, then check the units side by side. That five-minute habit catches the wrong connector or pulley style long before you have the car half apart.
The Step-by-Step Alternator Removal Process
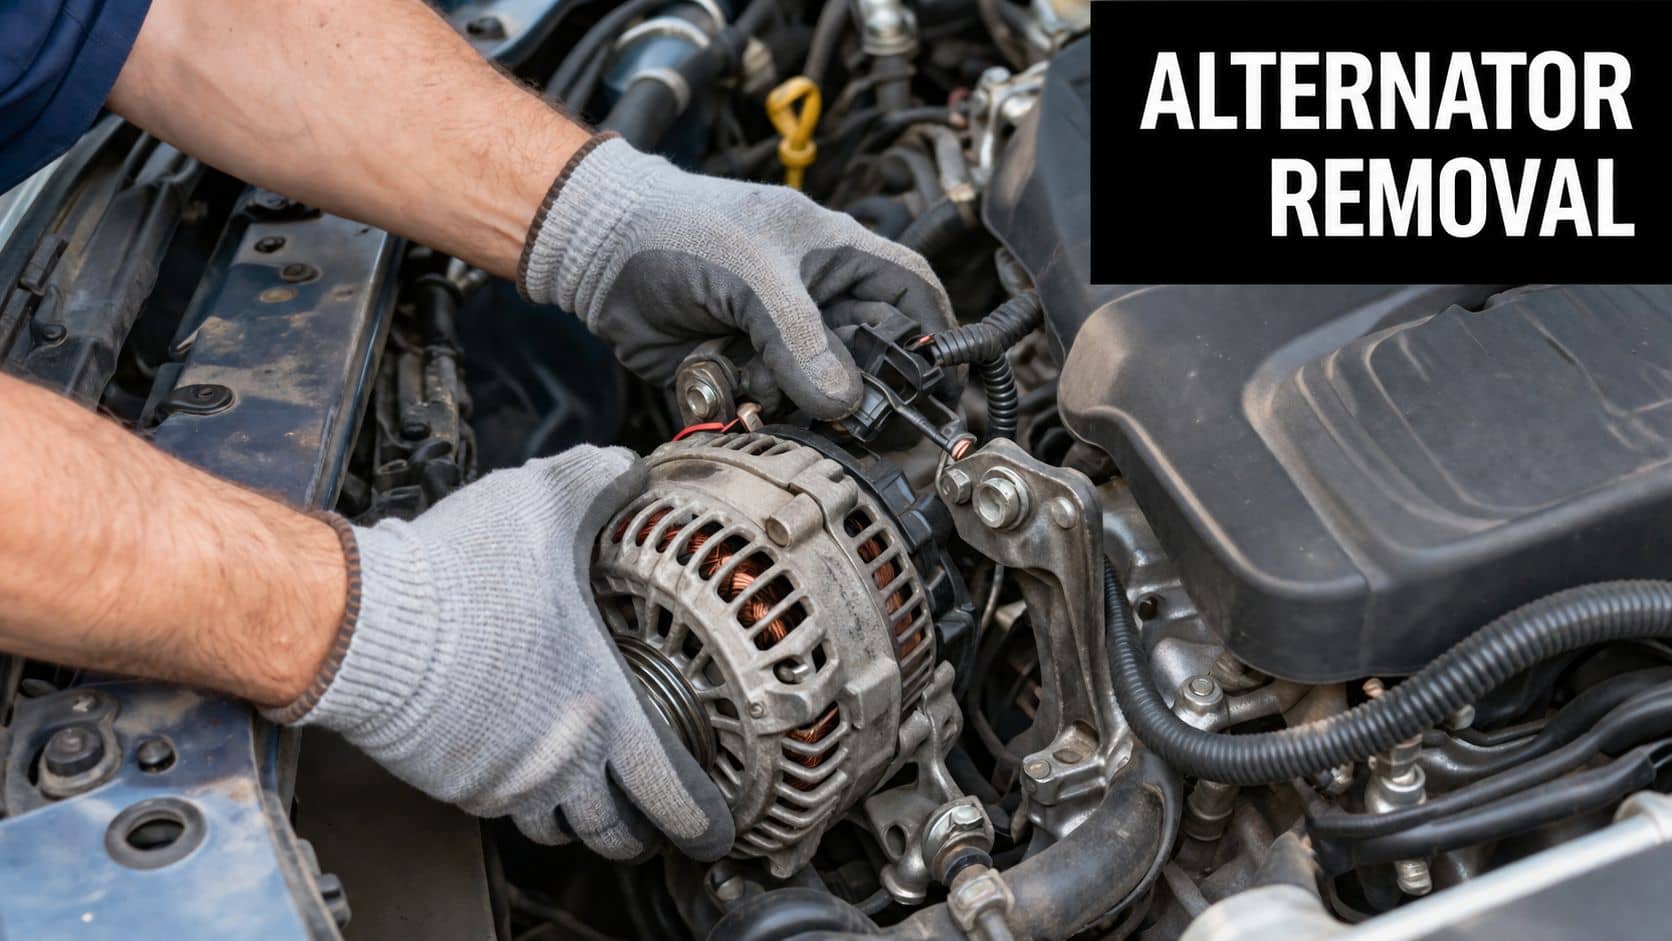
The safest place to begin is with the battery disconnected. Remove the negative terminal first, because that cuts the risk of accidental short circuits while you're working around the main charging cable and starter-side wiring. Don't rush this part, because a slipping spanner near live terminals is exactly the kind of avoidable mistake that turns a simple repair into a bad afternoon.
Get the belt routing on record
Before anything comes off, take a clear photo of the serpentine belt routing. Many engines use tight accessory layouts, and even a good memory can let you down once the belt is on the floor. If the belt comes off cleanly and goes back wrong, the alternator may never charge properly and other ancillaries can be affected too.
If the belt layout looks awkward, photograph it from two angles, not one.
Now release the belt tensioner carefully with the correct tool. Keep control of the movement, ease the belt off the alternator pulley, then move it clear of the work area. If the belt looks glazed, cracked, or contaminated with oil, that's worth noting before reassembly, because a tired belt will undo a good alternator swap.
Disconnect the electrical connections
Once the belt is off, focus on the wiring. Most alternators will have a main charging cable and a smaller plug connection, and both need to come off cleanly without damaging the terminals. Don't pull on the wire itself, use the connector body or terminal nut where appropriate.
This is the stage where patience pays. On some cars, the plug clip will be brittle, or the nut on the main terminal will be tucked into a very awkward corner. If you have to work by feel, keep the movement steady and avoid twisting parts that should move in a straight line.
Unbolt the alternator without fighting the car
The mounting bolts are usually straightforward in theory and awkward in practice. Some vehicles give direct access from above, others hide one fastener under a bracket or against the inner wing, and a longer extension or a wobble socket can make the difference. If you're dealing with seized bolts, apply sensible force and avoid rounding the heads.
A tidy socket set helps here, especially when clearance is tight. Once the fasteners are out, support the alternator as you remove the last bolt, because the unit can be heavier than it looks and it's easy to pinch a hand between the casing and the bracket. After that, lift it clear and compare it with the replacement before you go any further.
Installing Your New Alternator and Final Checks
Before the new unit goes anywhere near the engine bay, set it beside the old one and check every visible detail again. Match the mounting ears, pulley, electrical connector, and casing shape, because the costly mistake is fitting the wrong alternator after you have already done the hard work. If anything looks different, stop there and confirm the part number before you go any further.
A good UK DIY job starts with the right part on the bench. If you bought from a trusted supplier such as GSF, compare the replacement against the original straight away so any mismatch is caught before the spanners come back out.
Fit it cleanly, then tighten it properly
Offer the alternator into place and start all the bolts by hand before tightening anything fully. That lets the unit sit naturally in the bracket instead of pulling it against the mounting points. Once it is seated correctly, tighten the fasteners evenly and to the correct torque spec for your vehicle, because overtightening can distort brackets and under-tightening can let the unit move under load.
Reconnect the electrical connections securely, and make sure the main charging cable sits squarely on the terminal. A loose terminal can mimic a failed alternator within days, so do not rush this part. After that, refit the serpentine belt using the routing photo you took earlier, and check that the belt is sitting properly in every pulley groove.
Restore power and prove the charge
Reconnect the negative battery terminal last. Then start the engine and let it settle, while checking that the belt runs true and the warning light behaves normally. A healthy charging system should read between 13.5 and 14.5 volts at the battery terminals with the engine running, according to alternator testing guidance.
That final multimeter reading matters more than the hand tool work you have just finished. It shows the alternator is charging, the wiring is carrying current correctly, and nothing has been undone by a loose plug or a poor belt setup. If the reading is outside range, stop and re-check the installation before blaming the new part.
I would also listen for belt noise and watch for flickering lights after a short idle period. A clean install should look boring, and boring is exactly what you want after a charging-system repair.
DIY vs Garage Costs Knowing When to Call a Professional
A professional alternator replacement in the UK usually sits somewhere between £250 and £800, with RAC putting the average at £513. That is why so many people consider doing the job at home first. Labour makes up a big part of the bill, and if you can confirm the fault and fit the right part yourself, the total outlay can drop sharply. RAC's cost guide is still useful here, because it shows how much the price can change with access, vehicle design, and the time a workshop needs to do the job properly.
The savings are genuine, but the limits are just as real. Some cars place the alternator low in the engine bay, or tuck it behind a tight belt run, and that can turn a straightforward driveway repair into a slow fight for access. Seized fasteners, awkward routing, or doubt over the exact part can quickly push the job from manageable to frustrating.
A simple decision check
Choose DIY if: you have already diagnosed the fault, you can identify the exact alternator, and the tools are laid out before you start.
Choose a garage if: the belt layout looks awkward, access is poor, or you cannot confirm the part match with confidence.
Stop and reassess if: the battery test, belt check, and wiring inspection do not point clearly to the alternator.
The right repair is the one that fixes the fault once, not the one that looks cheapest on day one.
Modern cars make fitment accuracy more important than it used to be, especially where several alternator variants exist for the same model line. If you are unsure, a parts counter or an independent workshop can save you from paying for the same labour twice, which is usually where overall costs start to climb. For many UK drivers, the sensible approach is a mix of the two. Diagnose at home, source the exact part carefully, then hand the vehicle over if the physical job is beyond the tools or space you have available.
If your charging system is showing warning signs, check the battery, belt, and wiring first, then buy the exact alternator only when you are sure. Order the correct part, compare it carefully with the old unit, and use GSF Car Parts to get the match, the tools, and the support you need for a clean repair.