Fully working headlight bulbs and brake light bulbs are among your vehicle's most critical safety elements. As well as signalling your intentions to other road users and pedestrians, they're also essential for increasing your visibility during dark or poor conditions.
Car Bulb Safety First
Driving without either of these lights working, particularly at night-time, where they're imperative to everyone's safety, is against the law. If you're seen driving without these essential lighting elements illuminated, you'll likely get pulled over by the police and given a vehicle defect rectification notice – if you were unknowingly driving with these out. This notice means you're given a 14-day period to get the issue fixed and provide proof to the police that it's been sorted, e.g., with paperwork from a mechanic or with evidence that you've bought the items to do the repairs yourself.
If the police find that you know your headlight and brake lights are out, you will likely receive a £100 on-the-spot fine. These penalties can rise depending on individual situations, so you must frequently check your headlights and brake lights to ensure you're never caught driving without them.
While taking your car to the mechanic is a good idea, changing your headlight and brake light bulbs is a straightforward process that many non-experts can conduct at home. Plus, it can be quicker than waiting for availability at your local garage.
If you need any new bulb, just get yourself over to our bulb section to find the correct ones for your car.
Headlight and Brake Light Bulb Knowledge 101
To help you get started, we've compiled this handy guide to show you how to change your headlight bulb and brake lights. We'll cover:
Everything You Need To Know About Headlights
How Often Should You Change Your Headlight Bulbs?
How to Pick the Correct Headlight Bulbs for Your Vehicle
How to Change Your Headlight Bulbs
Everything You Need to Know About Brake Lights
How Often Should You Change Your Brake Light Bulbs
How to Pick the Correct Brake Light Bulbs for Your Vehicle
How to Change Your Car Brake Light Bulbs
Car Bulb Know-How
Everything You Need To Know About Headlights
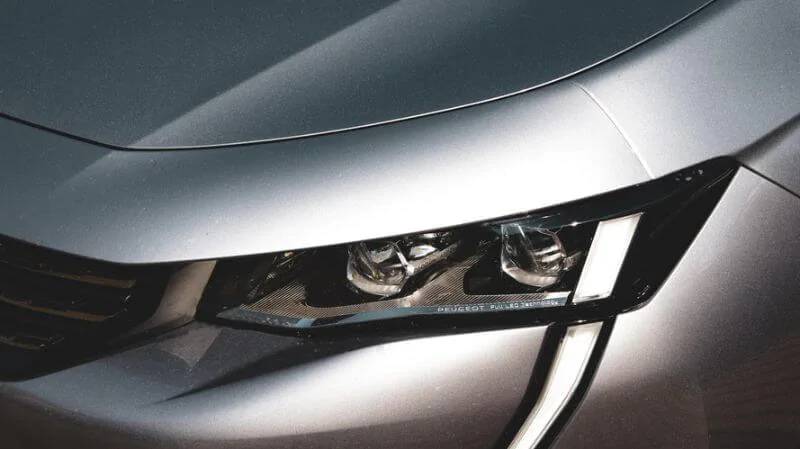
Your vehicle will have two types of headlights: dipped and full-beam headlights. The former are angled downwards on your car so they cast light onto the road ahead, ensuring you can see where you're going and illuminating any hazards during your journey.
Your full-beam headlights are angled higher than your dipped headlights and will be your vehicle's brightest type of headlight. These should only be switched on when driving down unlit roads and must only be used when there's no other car in front of you.
Both are exceptionally important for keeping you safe on the roads, but how often do you need to change the bulbs in them? We'll be explaining this below.
How Often Should You Change Your Headlight Bulbs?
There's a common misconception among drivers who believe you should wait until your headlight bulb has gone out before you look to change it. However, doing this can mean encountering some of the abovementioned problems, including large fines and being booked by police.
The lifespan of your headlight bulbs can depend on the bulb type in your vehicle. For example, traditional halogen headlight bulbs can last between 450 and 1,000 hours, while high-intensity discharge headlight bulbs can have a duration of between 2,000 and 10,000. LED bulbs have the longest lifespan of all bulb options, with a potential life of 40,000 hours before they need replacing.
As well as being equipped with the knowledge of your bulb's typical lifespan, it's worth knowing the tell-tale signs of a headlight about to fail. These include:
Flickering headlights
Excessive or prolonged use of your headlights will burn out the filament, signalled by a flickering light – like when a candle is almost at the end of its wick. However, this can also be a sign of a faulty battery connection if your car isn't too old, so check for any loose connections at terminals.
Dimmer headlamps
As your headlights become more run down, they won't have the same brightness as they previously did. This will likely continue to happen until they fizzle entirely out and can indicate that you'll need to change your headlights sooner rather than later.
One headlight bulb is out
If you notice one of your headlights is already out, it's usually an indication that the others are going to follow suit soon, especially if you conducted maintenance on them at the same time previously.
You'll also need to know that, as well as old age, your headlight bulb can go out for other reasons, including exposure to extreme heat and cold, oxidation, and cracks in bulb housing.
How to Pick the Correct Headlight Bulbs for Your Vehicle
Once you've identified that it's time to change your headlight bulb, it'll be vital that you source the correct ones for your vehicle. But how will you know which ones will be compatible with your car? Consulting your manual is your best bet, as it should detail all of the parts used within your car. However, if you need help with your car bulb search, you can use our handy product finder tool by entering your registration number into the designated box on the car bulbs page. So, whether you need a headlight bulb for a Ford Focus or a Land Rover, we'll then be able to reveal all of the headlight bulbs we stock that are compatible with your car!
No matter how you find out which headlight bulbs are suitable for your vehicle, you'll need to consider which will suit your driving style best. This means considering their life expectancy, brightness, and whether you'd prefer a white or yellow-toned bulb – the former tends to have more advantages, including reflecting road signs better in dark conditions and giving a clearer, crisper view.
How to Change Your Headlight Bulbs
Changing your headlight bulb is a simple process and can be done in 6 simple steps for most vehicles. However, it's always best to check your owner's manual for instructions for your specific model and to locate things correctly and safely.
You will need:
Replacement headlight bulbs that are compatible with your car
Once you've collected the above, you can look at changing your headlights:
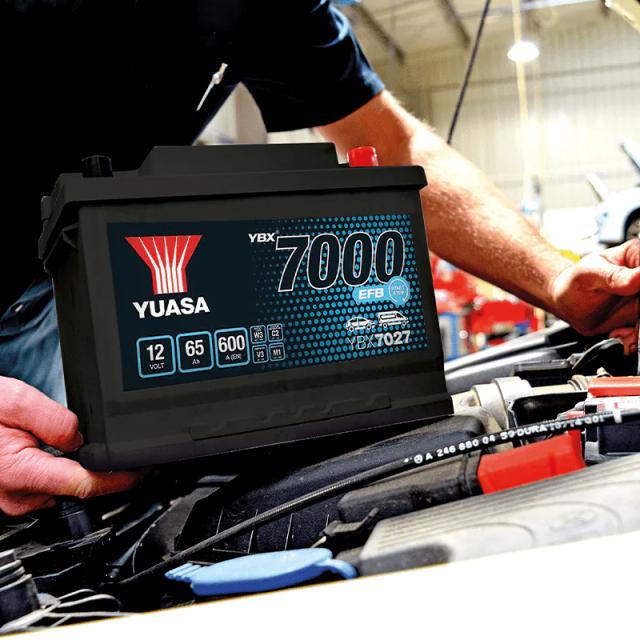
Turn your engine off and let it completely cool down before conducting any repair work. Make sure your keys are taken out of the ignition, too. As you'll be working with wiring, we'd also advise disconnecting the battery – you can find full details of how to do this in our car battery guide.
Pop open your car's hood to find your car's engine compartment and locate the
headlight bulb holder. These will be towards the front corners of your vehicle.
Disconnect the power wires from the headlight bulb and push down on the clip or cap holding them in place.
Pay attention to how the headlamp is secured (e.g. with hooks), and gently remove any fittings. You can then unscrew your headlight bulb – make sure your fingers aren't on the glass when doing this, as pressure, oil and dirt from your hands can cause it to shatter.
Screw in your new headlight bulb, again without touching the glass and secure it in the same way the old one was, e.g. by replacing any clips or caps.
Reconnect your battery(using the process outlined in our car battery guide), close the hood of your car, and you should be good to go!
It's worth noting that it'll be a little trickier for some vehicles to get to the bulb to replace it. Instead of being clear of any obstructions, you might find your headlight hidden behind the battery or air filter housing. And, sometimes, you'll even have to take the inner fender out to get to the headlight to change it. If you find engine parts in the way, you'll need to take great care to work around them.
Some cars, like Citroens, Volvos, and Golfs, typically are trickier to change the headlight bulbs on. So, if you have these or any other car models which require more work, it's always best to seek the help of a mechanic.
Everything You Need to Know About Brake Lights
Your brake lights are vital for letting drivers behind you know that you're slowing down or coming to a halt so they can follow suit and avoid accidents. According to the lighting requirements in the Highway Code, you must ensure all your brake lights are always working. Failure to replace any bulbs that are out can result in anything from a verbal warning to a vehicle defect rectification notice, or in the worst-case scenario. You can see your car getting impounded. So, you must regularly check these.
If you need a new complete replacement rear light unit that has all the rear bulbs fitted (brake, tail, reverse, and indicator lights), you can find those in our light and lenses section on our website.
The easiest way to check your brake lights are properly working is to ask someone to help. All they'll need to do is stand in behind your car while you turn them on. However, if there's nobody about and you need to check yourself, we'd recommend reversing in front of some windows and gently tapping your brakes. Aiming to do this at least once a week would be best.
While it used to be the norm to have two brake lights – one on either side of the vehicle's rear – most modern cars will have three, with the extra one located below the flank. This helps make your brake lights even more visible and can help drivers behind you react more quickly when you brake, reducing the chances of an accident.
How Often Should You Change Your Brake Light Bulbs?
Typically, your brake light bulbs will last around four years before their filaments are totally worn down and break. This roughly equates to about 40,000 miles of driving, so if you frequently use your car for long-distance journeys, you might find your brake lights go out quicker than the typical 4-year period.
We'd always advise changing your brake lights in pairs, as they have the same lifespan, and once one is out, there's no doubt the other is to follow suit soon after.
You want to avoid being caught with your brake lights out, so you should regularly check that they're working as they should be. If your brake lights are constantly lit or coming on and off irregularly, it might indicate that you need to change your brake light switch, too.
How to Pick the Correct Brake Light Bulbs for Your Vehicle
Changing your brake light bulbs is a simple procedure and can be done right on your driveway. But first, you'll need to be equipped with the correct brake light bulbs for your vehicle. You can either check your car's manual or use our handy product finder tool to pick one suitable for your car. Simply enter your registration plate in the designated box on the brake light bulb page, and we'll show you which brake lights will fit perfectly with your car's make and model.
You're sure to be greeted with a selection of replacement car light bulbs, so it's worth knowing a little about each and seeing which will match up best with your driving style and requirements. There are three main bulbs to choose from:
Halogen Bulbs
These are the most common car bulb types and are fitted with a thin metal filament heated by an electric current and halogen gas to produce the light. This is typically the cheapest option for car bulbs and usually lasts 500–1,000 hours.
Xenon HID Bulbs
These car bulbs are typically fitted in modern car models and require a newer fitting. Rather than a filament, Xenon bulbs use two electrodes and work based on a gas discharge principle. They tend to be more expensive than halogen options but last three times longer, so they are a great option if you often drive long journeys at night.
LED Bulbs
LED lights are more environmentally friendly than halogen bulbs, and most can be used as replacements. However, the power of an LED is so low compared to traditional halogens that your car could flag it as not working on the dashboard.
How to Change Your Car Brake Light Bulbs
Your brake light bulbs can be easily changed at home with just a few things – and it'll be reasonably quick to do, too!
You'll need:
A screwdriver
Gloves
Replacement brake light bulbs
Dielectric grease
You can then follow these five simple steps to replace your old brake light bulbs:
Turn off your engine and let your car cool completely before repairing it. Make sure your keys are also taken out of the ignition.
Use a screwdriver to remove the taillight housing, which protects your taillight, brake light, and reverse light bulbs. This will be an excellent opportunity to inspect your taillight seal and ensure it is properly fixed in position and not gaping.
Remove the brake light bulbs that no longer work, being careful not to put your fingertips on the glass. You may need to unclip or unscrew the bulbs, so make sure you look at how they are secured.
You can then fit your new brake light bulbs in the reverse way you removed the old ones. Make sure to secure them with any screws or caps if applicable. Your manual will usually have instructions on how to do this properly if you need clarification.
Top tip: Apply some dielectric grease to the metal end of the new brake light bulb so it can resist corrosion and rust and is easier to remove next time.
Re-attach the taillight housing, screw everything in securely, and you're good to go!
The exact process will also work for your high-level brake light, which sits in the middle of your taillight and brake light.
Make sure you're never caught breaking the law by learning to change your car headlight and brake light bulbs with the tips in this guide. You'll save yourself time, effort, and money. And, as it's a simple process to change either of these essential bulbs, you can follow it easily. However, if you have any reservations, take your vehicle to a professional mechanic.
Car Bulb Know-How
You can get brand-new premium replacement bulbs for every light by heading to our bulb page.
Here at GSF Car Parts, we have a range of essential components to keep your car running like a well-oiled machine. This includes everything from electrical and lighting parts to engine oils, and service parts, so you're sure to find what you need for all your repair needs.
Shop Car Bulbs at GSF Car Parts Online and In-Store
All our car bulbs are from trusted brands in the motoring industry, so you can count on them to be reliable and of excellent quality. Plus, our low-price promise means you can always expect great value, too.
We offer free UK delivery on all online orders over £25, plus 60-day returns*. We also know you want to get your car up and running as soon as possible, which is why we offer a Click and Collect service that allows you to get your new car bulb in just an hour.
So, buy car bulbs from us with confidence today. Or if you're close to one of our 180 store locations across the UK & Ireland, drop by. Our experienced staff will be able to direct you to the correct part for your vehicle.