Your car still starts. It still gets you to work. But it doesn’t feel quite right anymore. The idle has a faint wobble at the lights, throttle response feels a bit lazy pulling out of a roundabout, and you’re filling up more often than you used to.
That’s exactly where a lot of spark plug jobs begin.
A spark plug change is one of those maintenance jobs that looks simple on paper and can still go badly if you rush it, use the wrong parts, or tighten things by feel alone. Done properly, it’s a straightforward DIY task on many UK cars. Done badly, it can leave you with a misfire, damaged threads, or a coil pack you didn’t mean to break.
If you’re working on something common like a Fiesta, Corsa, Yaris or similar petrol hatchback, the job is usually well within reach for a careful home mechanic. The key is preparation, clean working, and knowing when not to force anything.
Is It Time for a Spark Plug Change
You notice it on an ordinary run. The car starts, but it takes an extra turn on a cold morning. At the lights, the idle has a slight shake. Pulling onto a roundabout, it feels a bit flat rather than clean and eager. On a lot of petrol cars in the UK, that is the point where a spark plug change starts to make sense.
Spark plugs usually wear out gradually. You do not always get a warning light straight away, and you rarely get one dramatic failure first. What you get is a car that feels a little rougher, a little slower to respond, and a little less efficient than it used to be.
What worn plugs do
A spark plug has one job. It needs to fire cleanly, every time, under heat, pressure and load. As the electrode wears, the spark can weaken or become inconsistent. That leads to incomplete combustion, occasional misfires, hesitant acceleration and an engine that never feels quite settled.
You will often feel the change before you see anything obvious.
A tired set of plugs can also push fuel consumption the wrong way, because the engine is not burning the air and fuel mixture as cleanly as it should. If the car is using more petrol and there is no clear tyre, brake or driving-style reason for it, plugs are high on the list of things to check on a petrol engine. If you want to compare the right replacements for your registration before pulling anything apart, the GSF spark plug finder for vehicle-compatible spark plugs is the quickest way to avoid ordering the wrong set.
A car can run on tired plugs for a long time. It just will not run at its best.
Mileage matters, but symptoms matter too
Service intervals still matter, especially on cars that have gone a few years between proper tune-up work. Many modern petrol engines use long-life platinum or iridium plugs, so owners tend to forget they are there until the engine starts complaining. Older engines and budget plugs usually need attention sooner.
Do not rely on mileage alone, though. I have seen cars come in with plugs still inside the official interval but clearly past their best because of lots of short trips, poor running, or a coil issue that has stressed them.
Typical signs include:
Uneven idle: The engine feels shaky or sounds slightly lumpy when stationary.
Flat acceleration: The car responds, but it lacks the clean pick-up it used to have.
Harder starting: Especially first thing, in damp weather, or after the car has been sitting.
Poor fuel economy: You are filling up more often with no obvious cause.
MOT-related running issues: A weak spark can contribute to incomplete combustion and higher emissions.
When a spark plug change makes sense
The sensible approach is simple. Change the plugs when the service schedule says they are due, or inspect them sooner if the car starts showing the usual symptoms.
That second part matters. A plug can look tired long before a dashboard light appears, and the old set can tell you useful things about how the engine has been running. If one plug looks very different from the others, that points to a problem worth sorting before it turns into a bigger job.
Getting the Right Plugs and Tools
Most spark plug problems start before the bonnet is even open. Wrong plug type, wrong reach, wrong socket, no extension, no torque wrench. That’s how a basic service job turns into an afternoon of frustration.
Getting the parts right first saves you grief.
Pick the right plug for the engine
Not every plug that physically screws in is correct for the engine. You need the right thread, reach, seat type, and heat range. On many modern cars, you also need to know whether the engine was fitted with copper, platinum, or iridium plugs from the factory.
A simple way to avoid guesswork is to use the GSF spark plug finder with your registration number. That narrows the options to vehicle-compatible parts, which is far safer than matching by eye off the old plug.
Here’s the practical difference between common plug types:
Plug type | Best for | What to expect |
Copper | Older engines and shorter service intervals | Good value, but shorter life |
Platinum | Everyday petrol cars | Longer service life and less frequent changes |
Iridium | Modern engines that specify fine-wire plugs | Long life and stable performance, but handle with care |
If your car was designed for iridium, don’t downgrade just to save a few quid. You may save on the counter and lose it back in drivability, service life, or having to do the same job again sooner.
Don’t start without the proper kit
For many popular UK cars, access is tighter than people expect. Ford Fiesta and Vauxhall Corsa engine bays often need thin-wall or extended-reach spark plug sockets, and RAC-linked guidance notes a 15% rise in misfires from botched DIY changes, often due to inadequate tools.
That’s not a small detail. If the socket is wrong, you can crack an insulator, round off a hex, or fail to seat the tool properly down the plug well.
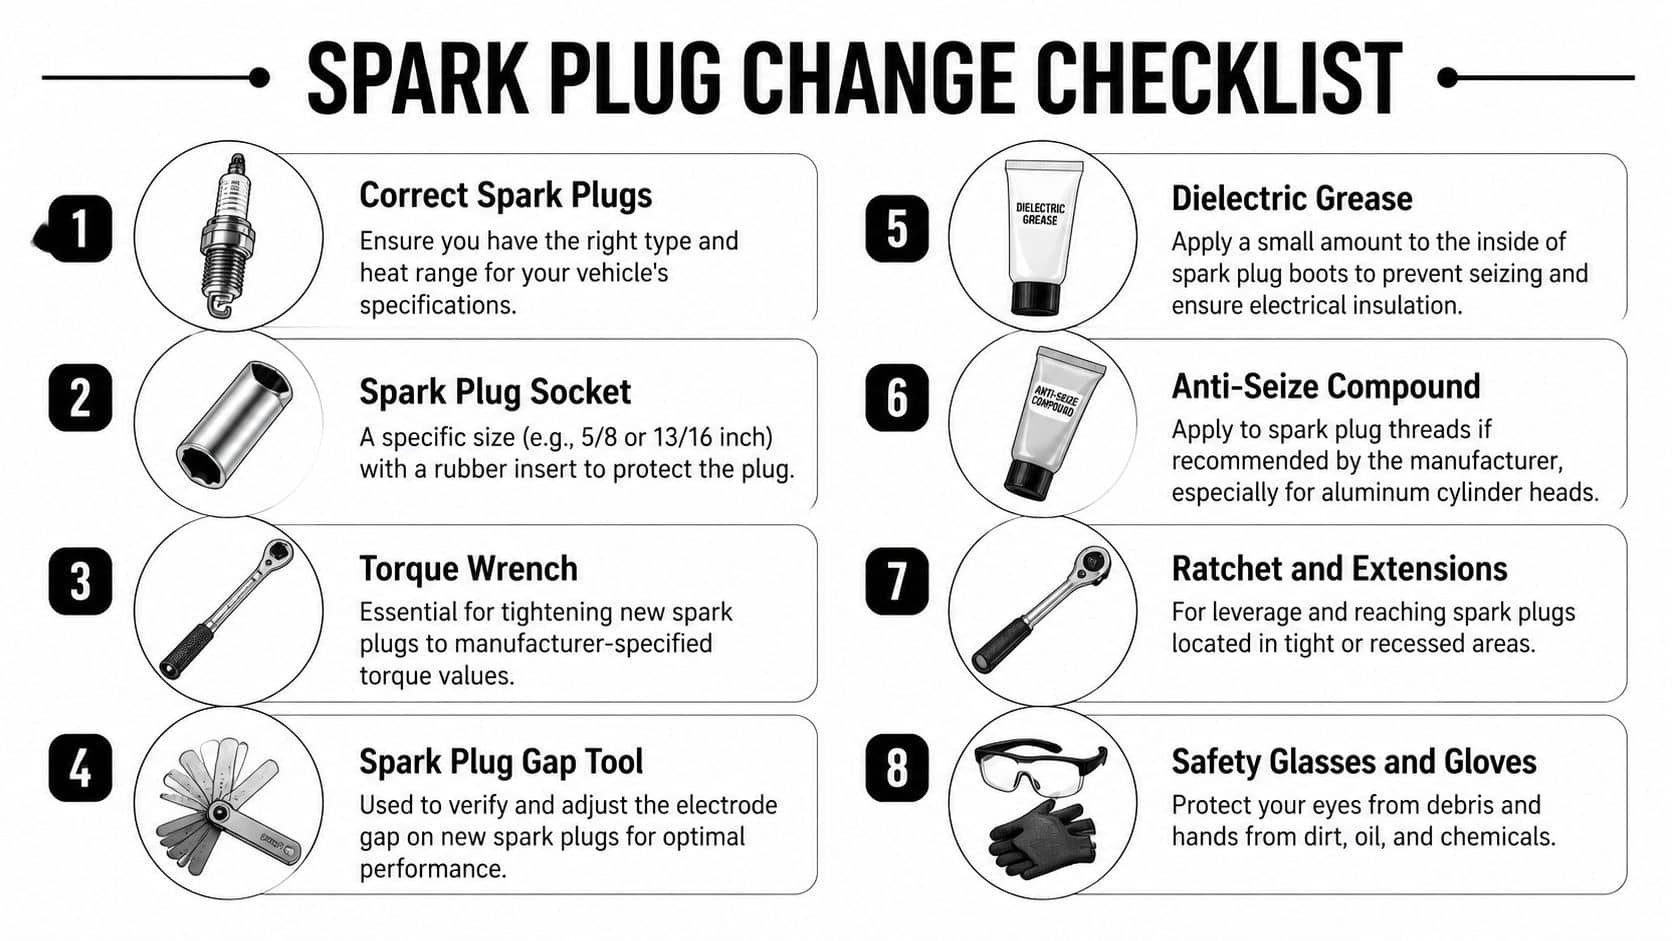
Your checklist before you begin
Correct spark plugs: Match them to the vehicle, not just the engine size.
Spark plug socket: Usually thin-wall on tighter modern petrol engines.
Ratchet and extensions: Useful for deep plug wells and awkward angles.
Torque wrench: The safest way to tighten new plugs without damaging threads.
Gap tool or wire gauge: Only if your plug type requires checking.
Dielectric grease: For the inside of the boot where appropriate.
Anti-seize compound: Only if the plug maker or vehicle guidance allows it.
Gloves and eye protection: Worth having once you start blowing debris from around the plug wells.
If you have to “make do” with tools from the bottom of a mixed socket drawer, stop and get the right bits first.
A spark plug change is cheap compared with repairing stripped threads in an aluminium cylinder head.
Safely Removing Your Old Spark Plugs
This part sets the tone for the whole job. If removal is tidy and controlled, installation usually goes the same way. If removal gets rushed, that’s when people tear boots, drop dirt into the cylinder, or damage threads trying to free a stubborn plug in one go.
Start with a cold engine. Not warm. Properly cold.
First steps that matter
Disconnect the battery’s negative terminal before you start working around the ignition system. Then remove any plastic engine cover so you can see the coil packs or leads clearly.
Once the plugs are accessible, don’t reach for the ratchet yet.
Practical rule: Clean around each plug before loosening anything. Dirt dropped into the plug hole goes straight where you don’t want it, into the cylinder.
Use compressed air if you have it. If you don’t, use a soft brush and patience. The point is to clear grit, leaves, and dust from the recess before the plug comes out.

If you need a deeper or narrower socket for a recessed plug well, a set of individual spark plug sockets and hand tools makes life much easier than trying to improvise with whatever happens to fit.
If your car has coil packs
Most modern petrol cars use coil-on-plug ignition. That means one coil pack sits directly over each spark plug.
The safe sequence is:
Unclip the electrical connector.
Remove the retaining bolt if fitted.
Twist the coil boot gently to break the seal.
Pull upward steadily.
Don’t yank it sideways. The rubber boot can stick to the plug, and side-loading the coil can crack the housing or tear the boot.
If your car has HT leads
Older petrol cars may have ignition leads instead. These need the same basic treatment, but you pull the boot, not the lead itself. Grip the boot, twist slightly, then lift it off.
If you pull on the cable, you can separate the lead internally and create a fault that didn’t exist before the job started.
Removing the plug itself
With the area clean and the coil or lead out of the way, fit the spark plug socket squarely onto the plug. Loosen it steadily. If it resists, don’t try to shock it free with brute force. Apply controlled pressure and work carefully.
Once loose, spin it out by hand if possible and lift it clear.
Put each old plug down in order if you’re curious about engine condition. Cylinder-by-cylinder comparison can tell you a lot, especially if one plug looks noticeably different from the others.
Gapping and Installing New Spark Plugs
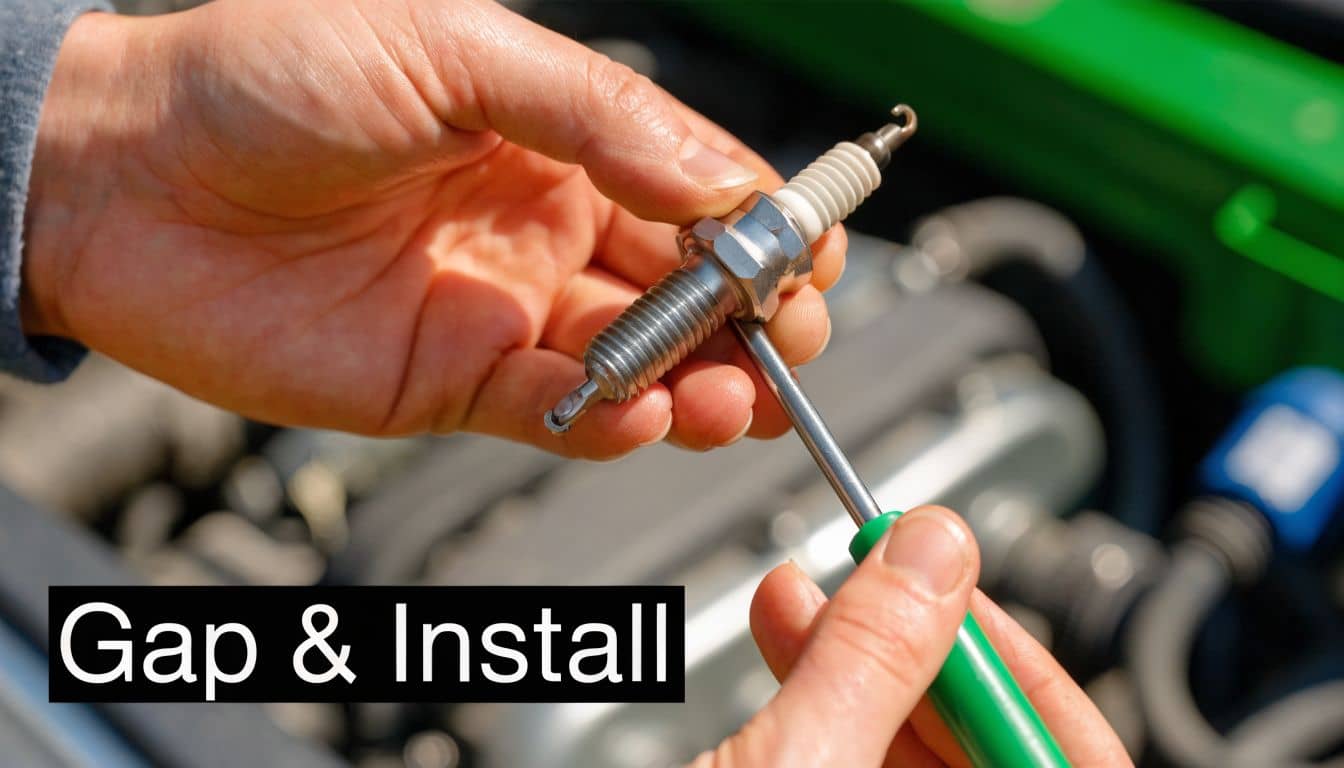
This part decides whether the job stays satisfying or turns into an expensive thread repair. New plugs are easy to ruin on the bench or on the first turn into the head, especially on aluminium engines common in UK cars from Ford, Vauxhall, Volkswagen, BMW and MINI.
Check the gap only if the plug type allows it
Start with the box and the plug maker’s instructions. Many modern iridium and platinum plugs come pre-set, and some fine-wire designs should not be adjusted with a standard gapping tool because the centre electrode can be damaged.
If the plug is the type that can be checked, use a wire gauge, not guesswork. The gauge should pass through with a light drag. If the gap is wrong, correct it carefully and only by moving the ground electrode. Never pry against the centre electrode or tap the tip on the bench. That is a good way to turn a new plug into scrap before it ever fires.
If you are ordering parts for a common UK registration, GSF’s number plate finder helps cut down the risk of getting the wrong plug design in the first place. That matters here, because the correct plug for the engine often determines whether any gap adjustment is needed at all.
Start every plug by hand
A spark plug should screw in smoothly for several turns with almost no effort. If it does not, stop.
The safest method is to fit the plug into the spark plug socket and extension, but leave the ratchet off while you start the thread. That gives enough reach and enough feel to catch a problem early. On tighter transverse-engine bays, where access is awkward and the plug holes sit at an angle, this matters even more.
Cross-threading a plug into an aluminium head gets expensive quickly. Back it out, check the angle, and try again until it threads cleanly.
If the plug will not start cleanly by hand, the fix is to reset and try again, not add more force.
Tighten to spec, not by feel
Once the plug seats, tighten it to the vehicle or plug manufacturer’s torque figure if you have it. A torque wrench is the tidy option and the one I’d use whenever access allows.
If you do not have a torque wrench, follow the plug maker’s tightening guidance for that specific plug seat type and washer design. Gasket-seat and taper-seat plugs are not tightened the same way, and treating them as interchangeable is where DIY jobs go wrong. The aim is simple. Compress the seat correctly without straining the threads.
Here’s the practical difference:
Method | Better for | Main benefit |
Torque wrench | Most DIY jobs | Accurate clamping without guesswork |
Maker’s angle guidance | Situations where you cannot use a torque wrench easily | Consistent seating when followed exactly |
A visual walkthrough helps if you haven’t done this before: Spark Plug Replacement DIY (the ULTIMATE Guide)
Refit coils or leads with the same care
Once the plugs are in, refit each coil pack or HT lead to the correct cylinder. Press the boot fully home so it sits properly on the plug. Reconnect the electrical plugs and reinstall any retaining bolts.
Take an extra minute here. On many first-time DIY spark plug changes, the plugs are fitted correctly but a coil connector is left half-clipped or a lead is swapped over. If you picked up the parts through GSF Click & Collect and want the car back on the road the same day, this is the point where careful refitting saves a frustrating misfire on startup.
Avoiding Common Mistakes and Problems
A spark plug change usually goes wrong in ordinary ways. A plug starts in the hole slightly crooked. Dirt drops into the tube. A coil connector feels fitted but is not fully home. On many common UK cars with aluminium heads, the expensive mistake is not the plug itself. It is damaged threads from rushing a simple job.
The pattern in the workshop is consistent. Trouble starts with poor thread engagement, the wrong plug for the engine code, or a connection fault after refitting. Using your registration in the GSF spark plugs range helps cut out one of the biggest DIY errors, which is ordering plugs that physically fit but are not correct for the car.
Three mistakes that cause most of the grief
Starting the plug with a ratchet: Always begin by hand with the socket and extension only, or a plug starter tool. If it does not turn in cleanly, back it out and try again.
Ignoring dirt around the plug well: Grit in the well often ends up in the cylinder once the old plug comes out. A quick blast with compressed air or careful vacuuming before removal is time well spent.
Mixing up coils, leads, or connectors: This is common on first-time jobs. Label parts as they come off, especially on older petrol cars with HT leads.

Read the old plugs before binning them
Old plugs tell a useful story. Four plugs with similar wear usually point to a normal service interval. One plug that looks wet with oil, heavily sooted, white and chalky, or badly different from the others deserves attention before you call the job done.
That does not mean you need to diagnose the whole engine on the driveway. It means you should notice patterns. A single odd plug can point to a coil fault, injector issue, oil control problem, or air leak affecting one cylinder.
One plug that looks wrong is often the clue. Four evenly worn plugs usually just mean the service was due.
If a plug is stubborn
Use patience, not force. On an engine that is still warm or has not had plugs out for years, a seized plug can turn a routine service into a thread repair.
Keep the socket square and work it gently. If it starts to move, then tightens again, stop and add a little penetrating oil around the seat if access allows. Let it soak, then work the plug back and forth in small movements. If it still feels risky, especially on a modern aluminium head, leaving it to a garage is the cheaper option compared with repairing stripped threads.
The same rule applies above the plug. Torn coil boots, cracked old leads, and half-latched connectors cause plenty of post-service misfires. If the engine runs badly after the change, check your connections first before assuming the new plugs are faulty.
Cost Time and Final Checks
For a typical four-cylinder petrol car, a first-time DIY spark plug change is a sensible driveway job. Give yourself a relaxed morning or afternoon rather than trying to squeeze it in before tea. Access varies a lot between cars, and the awkward part is usually getting to the plugs cleanly, not changing them once you’re there.
The main savings come from supplying your own service parts and taking your time. The bigger gain, though, is knowing the job’s been done properly. Correct plugs, clean threads, proper tightening, and no rushed shortcuts.
Final checks before first start
Use this as your pre-start routine:
Reconnect everything: Coil plugs, HT leads, battery terminal, and any removed engine covers.
Check the bay: No sockets, bolts, extensions, rags, or packaging left behind.
Confirm each plug location: Every coil or lead should be back on the correct cylinder.
Start and listen: The engine should settle into a clean, even idle.
Watch for warning lights: If one appears straight away, switch off and recheck your connections.
If the idle is smoother and throttle response feels cleaner, that’s usually the reward straight away. If it runs worse than before, don’t keep driving it to “see if it clears”. Stop and inspect your work.
If you need replacement service parts after checking your car’s registration, browse the spark plugs range at GSF Car Parts and make sure the plugs match your exact engine before fitting anything.
If you’re ready to tackle a spark plug change, GSF Car Parts makes it easy to find the right plugs, tools and service essentials for your vehicle using the registration lookup, with delivery or Click & Collect when you need parts quickly.