You notice it first at a set of traffic lights. The idle isn’t steady. The engine feels slightly uneven, as if one cylinder is always half a step behind the rest. Then there’s the extra fuel stop, the dull throttle response joining a dual carriageway, and that low-level suspicion that the car just isn’t right.
That’s often how injector trouble starts. Not with drama, but with a change in character.
A fuel injector has one job, but it’s a precise one. It has to deliver the right amount of fuel, at the right time, in a controlled spray pattern the engine can burn cleanly. When that pattern goes off, or the injector sticks, leaks, weakens or clogs, the engine tells you in ways that are easy to dismiss until they turn into a larger problem. If you’re considering fuel injector replacement, the smart move is to diagnose properly, buy carefully, and fit with absolute cleanliness. That’s what separates a successful DIY job from one that creates a new fault.
Is Your Engine Trying to Tell You Something
You pull up after a normal run, leave the engine idling, and something feels off. The revs are not hunting wildly, but the car no longer sounds clean or settled. On a UK daily driver, that change in character often shows up before a warning light, before an MOT emissions failure, and before the fault becomes expensive.
Injector problems rarely present as one neat symptom. A petrol engine may start cleanly from cold, then idle badly once warm. A diesel may still pull, but feel flatter through the mid-range, smoke more than it used to, or shake under load. Some cars log a fault code early. Others keep quiet while fuel delivery has already started to drift.
The reason matters. An injector does more than supply fuel. It has to meter the right amount and deliver it in a usable spray pattern, whether the engine is port-injected or direct-injected. If it sticks, dribbles, leaks, or atomises poorly, combustion quality drops. That is why injector faults can feel like several smaller problems at once.
Watch for patterns that repeat:
Uneven idle: Especially once the engine is fully warm.
Flat or hesitant acceleration: Often most noticeable joining a roundabout or dual carriageway.
Higher fuel use: The trip pattern has not changed, but fuel stops become more frequent.
Intermittent shudder or stumble: Sometimes only under load.
Hard starting or longer cranking: More common if an injector is leaking down.
Emissions trouble: Rich running, excess smoke, or a car that looks likely to struggle at MOT time.
One symptom on its own proves very little.
I would not order injectors based on rough running alone. Coils, plugs, air leaks, fuel pressure faults, carbon build-up, wiring issues, and low compression can all point you in the same direction if you guess instead of test. That is where DIY jobs get expensive in the UK. Not because the injector itself is always hard to change, but because the wrong parts get bought first.
There is also a practical risk in carrying on for weeks and hoping it clears up. A leaking injector can dilute oil, damage a catalytic converter or DPF over time, and leave you chasing extra faults that were not there at the start. Catch it early and you may be dealing with one bad injector, a seal set, and a careful afternoon in the garage. Leave it and the bill can spread.
Injectors can last well for years on a properly maintained engine. They also suffer quickly when fuel quality is poor, service intervals slip, or a car does lots of short, cold runs. If your engine has started behaving differently, take that seriously. A car usually gives you a warning period. The smart move is to use it.
Confirming a Faulty Fuel Injector
You can waste a lot of money on injectors that were never the problem. A proper check before you buy parts is what keeps a DIY fuel system job sensible, especially in the UK where one wrong order can mean postage, delays, and a car off the road longer than planned.
Treat injector diagnosis like a process of elimination. You are trying to prove one cylinder has a fuelling fault, then work out whether the cause is the injector itself, its wiring, fuel supply, or the engine mechanically struggling on that cylinder.
Start with simple checks that tell you something useful
Begin with the engine idling.
Put a mechanic’s stethoscope on each injector body and listen for a steady click. If you do not own one, a long screwdriver held carefully to the injector and then to your ear can give a rough comparison. You are not listening for perfection. You are listening for one injector that sounds clearly different from the rest.
That quick check only tells you the injector appears to be operating. It does not confirm it is delivering the right amount of fuel or producing a clean spray pattern.
While you are there, inspect the basics:
Connector security: A half-seated plug can give you a dead-miss that looks like injector failure.
Harness condition: Look for rubbed insulation, oil contamination, broken clips, or previous repair joints.
Fuel leaks: Dampness around the rail, injector top seal, or seat needs sorting before any further running.
Injector seating: On some engines, especially diesels, a leaking seal can create noise, fumes, and carbon build-up that confuses the diagnosis.
If you already know replacement is likely, it still pays to identify the exact cylinder and injector type before ordering from GSF’s range of fuel injectors for your vehicle.
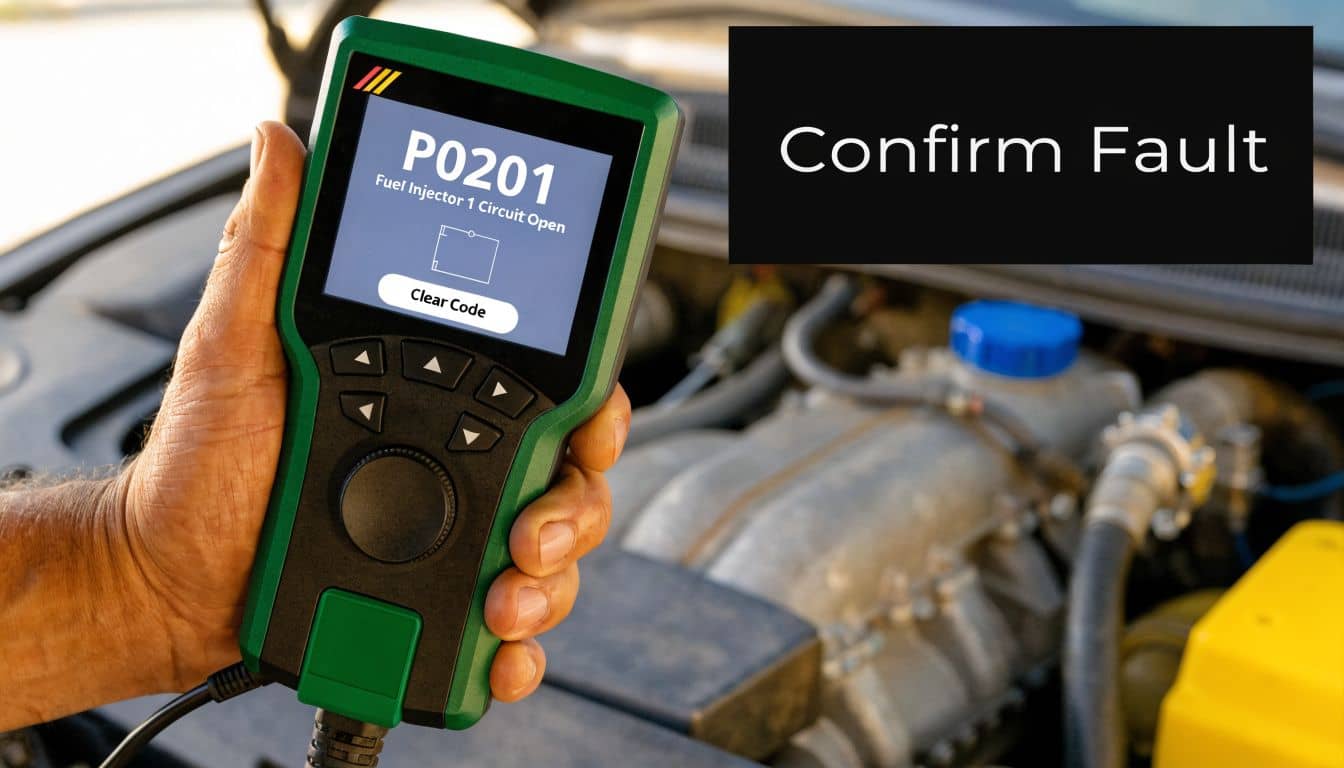
Read fault codes, then verify them
A code reader helps, but only if you use it properly.
For example, P0201 points to an injector circuit fault on cylinder 1. That does not automatically mean the injector has failed internally. The fault could sit in the plug, the loom, the ECU driver, or the power supply to that injector. Replacing parts before checking that is how a straightforward DIY job turns into guesswork.
Use live data if your scanner supports it. Look at:
Misfire counters
Cylinder contribution or smooth-running values
Short-term and long-term fuel trims on petrol engines
Injector correction values on diesels
Fuel trims matter on petrol cars because they show how hard the ECU is trying to correct the mixture. Large corrections can support the case for an injector fault, but they can also point to vacuum leaks, MAF issues, or fuel pressure problems. Keep the wider picture in mind.
On UK-market cars, manufacturer-specific scan data is often far more useful than a generic code reader, especially on common rail diesels and direct-injection petrol engines. If your tool only gives basic OBD information, you may confirm a misfire but still miss the reason for it.
Diesel balance rates need context
Diesel correction values are one of the better clues you can get at home, but they are not a final verdict on their own. As explained in this diesel balance rate diagnostic explanation, very small correction figures are a good sign, while large positive or negative corrections usually mean one cylinder needs closer attention.
The direction of the correction matters:
High positive correction: The ECU is trying to add fuel to a weak cylinder. That can mean a restricted or worn injector, poor fuel delivery, or low compression.
High negative correction: The ECU is pulling fuel back. That can mean over-fuelling, leakage, or an injector not controlling delivery properly.
In these situations, experience matters. A bad injector can create ugly balance figures, but so can poor compression, valve trouble, or a sealing issue. If one cylinder shows suspect balance data, has a different injector sound, and carries the fault code history to match, the case gets much stronger.
Electrical checks can save you from buying the wrong injector
If access is decent, check injector resistance against the vehicle spec, especially on older port-injection petrol engines. A reading that is open circuit, shorted, or well outside the others is a strong sign the injector itself has failed electrically.
Be careful here. Many modern injectors, particularly piezo and some direct-injection types, should not be tested casually with methods that suit older systems. If you are unsure, stop and verify the procedure for your engine code first.
A noid light or lab scope can also confirm whether the injector is being pulsed. That is more advanced, but it is the right move if the symptom says injector and the resistance check does not back it up.
Cleaner has a place, but only in the right case
A bottle of injector cleaner is a low-cost gamble for mild deposit build-up. It is not a repair for a leaking injector, a dead coil inside the injector, damaged wiring, or a spray pattern that has gone badly off.
Workshop cleaning is a different job entirely. Proper injector testing usually involves bench checks for electrical condition, spray pattern, and flow before and after cleaning. That level of testing can justify reusing an injector. A tank additive cannot.
Use cleaner when the symptoms are light, the car still runs reasonably well, and you suspect early contamination. If the engine is misfiring badly, smoking, washing fuel into the oil, or logging cylinder-specific faults repeatedly, skip the hopeful shortcut and diagnose it properly.
Decide whether you are proving a fault, or just chasing a symptom
Before you call an injector faulty, aim to answer three questions:
Is this cylinder the one causing the problem?
Is the problem electrical, hydraulic, or mechanical?
Do the scan data, sound checks, and visual checks support the same conclusion?
If the answers line up, replacement is a sensible next step. If they do not, keep testing. That extra half hour can be the difference between one injector, one seal kit, and a successful Saturday job, or a pile of parts that never fixed the car.
On diesels in particular, remember the MOT angle. A bad injector can push smoke, idle quality, and emissions in the wrong direction long before it becomes an obvious breakdown. Confirm the fault properly and you stand a far better chance of fixing the cause once, not just masking the symptom.
Sourcing Your Parts and Tools from GSF
You have done the diagnosis. Now the job either stays straightforward or gets expensive for the wrong reasons.
A fuel injector is one of those parts that punishes casual buying. The wrong flow rate, connector, seal type or calibration can leave you with the same fault, a new leak, or a car that runs worse than before. On UK cars, this catches people out most often on diesel trims and direct-injection petrol engines where the same model can use different injectors across close-looking engine codes.
Start with the reg. Then verify the engine code and, if needed, the VIN details against the old part before ordering anything. If the injector has a visible part number and you can read it without stripping half the engine, check that too. Ten minutes here is cheaper than return shipping and a lost weekend.
Choosing your replacement fuel injectors
The key choice is not dealer part versus cheap part. It is correctly matched, traceable stock versus a gamble.
Factor | Main Dealer (OEM) | GSF Aftermarket (e.g., Delphi, DriveTec) |
Vehicle match | Usually straightforward when ordered by VIN | Needs correct vehicle lookup and spec check |
Branding | Original manufacturer packaging | Aftermarket brand, often OE-matching in fit and function |
Price | Usually higher | Often more affordable |
Availability | Can depend on dealer stock | Often easier to source through motor factor stock |
DIY value | Good if you want the exact dealer route | Good if you want sensible cost control without going bargain-basement |
Warranty support | Dealer terms apply | Brand and supplier terms apply |
For many DIY jobs, quality aftermarket is the sensible middle ground. You save money, but you still buy from a known brand with proper cataloguing and support. That matters far more than flashy listing photos or vague claims about being "OEM quality".
If you need to compare options, fuel injectors by vehicle application at GSF are easier to filter properly than trying to decode random marketplace listings.
Buy by confirmed fitment and part spec. Never by appearance alone.
Replace one injector or a full set
There is no single rule here. There is a trade-off.
If one injector has clearly failed and the others are behaving properly, a single replacement can be the right call. That is often the budget-friendly answer on a modest-value car, especially if access is easy and the rest of the set has tested well. If the engine has high mileage, the injectors are original, or getting back in there is a miserable job, replacing the set often makes better sense.
The reason is consistency. Injectors do not just open and shut. They meter fuel, and engines run best when that delivery stays even across cylinders. One fresh injector alongside three tired ones can be fine, or it can leave you chasing trim imbalance, idle quality complaints, or another failure a month later. Use the car’s age, mileage, access difficulty and your test results to make the call.
On diesels, also keep the MOT in mind. Poor fuelling can show up as smoke, rough idle and emissions trouble before it becomes a full breakdown. Spending a bit more on the right parts now can save paying twice.
The tools that actually matter
This job rewards preparation. It also exposes flimsy tools fast.
A basic socket set will only get you so far. Injector jobs often involve brittle connectors, hidden rail fixings, stubborn seals and very little room to work cleanly. If the engine uses coded injectors or awkward retaining hardware, missing one tool can stop the job dead.
Tools worth having on the bench before you start
Socket and ratchet set: Include deep sockets for covers, rails and brackets.
Torque wrench: Rail bolts, clamps and hold-downs need the correct setting.
Trim and connector release tools: They help avoid snapped tabs and damaged plugs.
Fuel line disconnect tools: Required on many systems.
Lint-free cloths and workshop towels: Use them to catch fuel and keep dirt out of open ports.
Gloves and eye protection: Fuel in the eye is an immediate stop-work problem.
Magnetic tray or small parts container: Clips and bolts disappear quickly in an engine bay.
Tools that depend on engine design
Pick tools: Useful for old O-rings, clips and seal removal.
Injector puller or slide hammer: Some injectors seize in place and will not lift out cleanly by hand.
Compressed air or a safe way to clean around the injector bore: Dirt dropped into the port creates bigger problems than the original fault.
Diagnostic scanner: Needed for fault checks, live data confirmation and injector coding on some vehicles.
If you do not own a scanner or puller, price that in before calling the job cheap. DIY still saves money in many cases, but only if you accurately count the tool bill.
Don’t forget the consumables
Small parts stop more injector jobs than the injector itself.
Have the service items on hand before you open the fuel system:
New O-rings or seals: Old rubber should not go back in.
Injector seat washers where required: Common on many diesel applications.
The correct lubricant for seals if the manufacturer specifies one
Cleaner for the surrounding area: Use something suitable for external grime removal, not a product that leaves debris behind.
One-time clips, retainers or rail seals where the design uses them
This is also where smart spending matters. Reusing crushed washers, flattened O-rings or tired clips is how a cheap repair turns into a comeback job. Buy the injector, the seal kit and any likely one-use hardware together, and the rest of the work gets much easier.
The Fuel Injector Replacement Process Step by Step
Start this job with a cold engine, enough light, and enough time. Fuel injector replacement goes wrong in familiar ways. Connectors get broken because access is tight, dirt falls into an open port, or a seal gets nicked and the car comes back with a leak. A careful pace saves money here.
Lay out your tools before you crack the fuel system open. If you still need a puller, picks, or other vehicle servicing tools, get them on the bench first rather than improvising halfway through. On many UK cars, the awkward part is not the injector itself. It is the trim, pipework, and limited access around it.
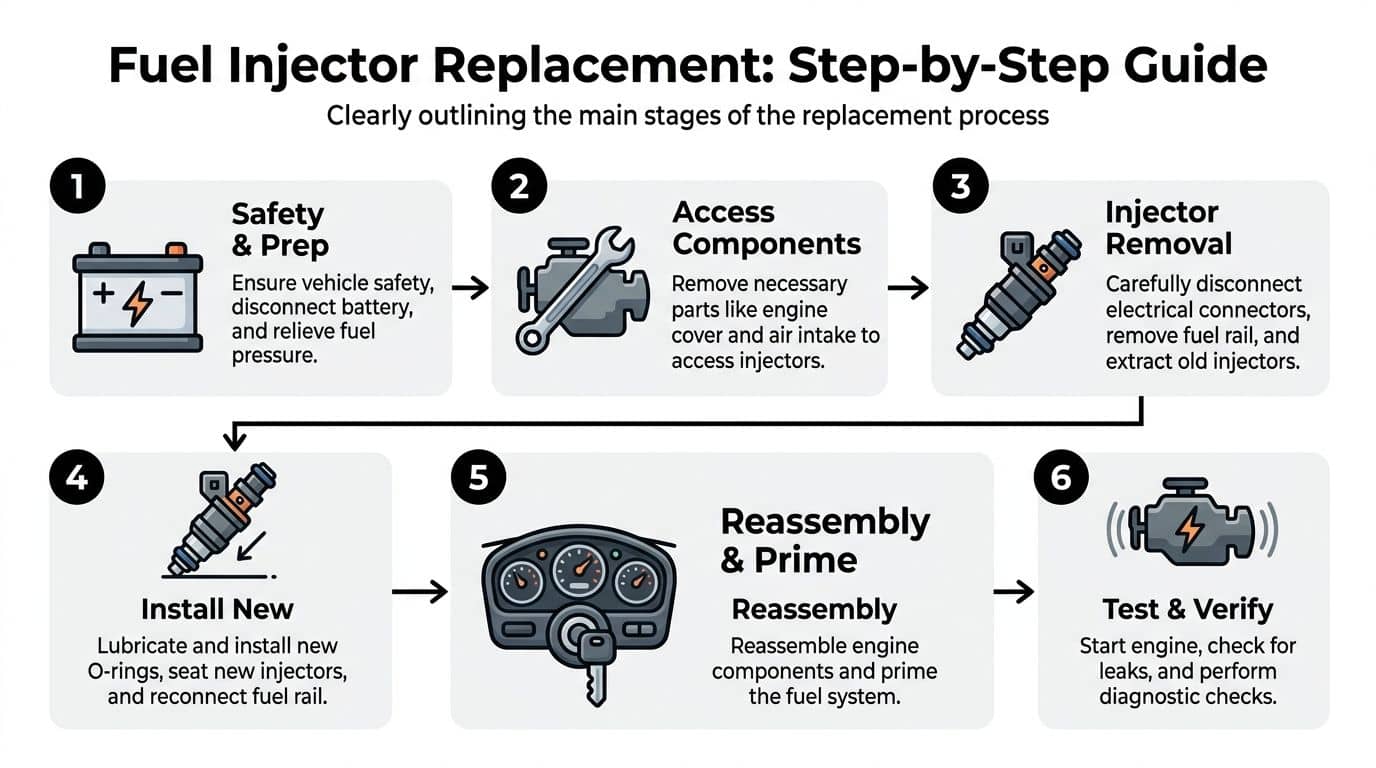
Start with safety and pressure relief
Fuel can stay under pressure long after the engine is switched off. Open the system carelessly and it can spray onto hot components or your face. Disconnect the battery, keep ignition sources well away, and follow the pressure relief method for your exact engine.
Heavy vehicle guidance from Truck Parts & Service on fuel injector replacement procedures describes common approaches such as using a relief valve where fitted or disabling fuel delivery and letting pressure bleed down through normal running. The workshop manual takes priority every time, especially on direct-injection petrol and diesel systems where pressures are much higher and the risks are different.
If the manual calls for a specific depressurisation procedure, follow it exactly. This is not the place to guess.
Gain access without creating extra faults
Some injector jobs are simple. Engine cover off, intake pipe moved, rail in view.
Others involve the intake manifold, breather hoses, brackets, sound deadening, and electrical trays. Take photos before you remove anything. On a first-time DIY job, those photos are often what get the vacuum lines and clips back where they belong.
Work in a clear order:
Remove covers and intake parts that block access.
Move wiring trays, breather lines, or brackets carefully.
Expose the rail or injector area fully.
Clean the area before loosening any fuel fitting.
Do not skip the cleaning stage because the top of the engine "looks fine". Fine is not clean enough once an injector bore is open.
Clean the area before removal
Most replacement problems start with contamination, not with the new part. Dust, grit, old carbon, and pooled grime around the injector well all want to fall into the engine the moment you pull the injector free.
Brush away loose dirt first. Then wipe the area and use a suitable cleaner on the outside only. Blow out recesses if you have a safe way to do it. Keep going until the rail, clamps, and surrounding area are clean enough that you would be happy to lay a white rag there.
Leave the new injector boxed for now. Open packaging too early and the clean part sits on a dirty bench while you fight with removal.
Remove the old injectors carefully
Unplug each electrical connector by releasing the lock tab properly and pulling on the connector body. Never tug the wiring loom. Brittle plugs and broken secondary locks are common on older UK cars, especially anything that has seen heat cycles for years.
After that, remove the rail fasteners or individual injector clamps depending on the design. Some injectors lift out with the rail. Others stay in the head or manifold until you pull them separately.
If one is stuck, stop and reassess. Use the correct puller if the injector is known to seize. Do not pry hard against aluminium, and do not twist plastic tops until they crack. A seized injector can turn a DIY-saving job into a head-off repair if you force it the wrong way.
A short video can help you visualise the general sequence before you begin.
How to Replace Fuel Injector 2003-2008 Toyota Corolla
Prepare the seats and seals
With the old injectors out, inspect every bore, seat, and sealing face properly. This is the point where you catch the reason the old injector failed to seal, and where you avoid fitting a good new injector into a bad seat.
Check for:
Old O-ring or washer material left behind
Carbon or varnish build-up around the seat
Scoring or corrosion in the bore
Signs of water or dirty fuel
Debris that will stop the injector seating squarely
Fit new seals, O-rings, and seat washers where the design uses them. Use only the lubricant specified for the seal material and only if the manufacturer calls for it. Too little can tear the seal on installation. The wrong lubricant can swell rubber or contaminate the fuel system.
Some injectors, especially on common rail diesels, also need coding. Check the replacement part and note any calibration code before fitting it. If your vehicle requires coding and you cannot do it, factor that in before you start. That is one of the key UK DIY trade-offs. The fitting may be straightforward, but the car still may not run correctly until the ECU knows which injector is installed.
Install in the correct order
Unbox the new injector only when the seat is clean and you are ready to fit it.
Install each injector squarely. If it does not want to sit home, remove it and find out why. Forcing it usually damages the seal or rolls an O-ring. Refit the rail or clamps evenly, hand-start all fixings, and tighten in sequence to the manufacturer torque setting. Uneven loading is a common cause of leaks and poor seating.
A sensible order is:
Fit injectors with fresh seals.
Align the rail or clamp hardware without side load.
Start all fasteners by hand.
Tighten evenly in stages.
Torque to specification.
Reconnect the electrical plugs fully.
Refit hoses, brackets, and intake parts.
Check every connector twice. One plug left loose can trigger a misfire, an engine light, and a lot of unnecessary doubt about the new injector.
Replacement timing and job value
Injector faults are not always injector failure. Some respond to cleaning, some trace back to wiring, and some are caused by poor fuel quality or a sealing issue rather than the injector body itself. As noted earlier, service history and symptoms matter. Replacing an injector without fixing contamination or a damaged seat only repeats the fault.
For UK DIYers, that matters for cost as much as method. If access is simple and the injector does not need coding, DIY can make good sense. If the injector is seized, buried under the intake, or part of a high-pressure diesel system, the smarter saving is often stopping before damage starts.
The standard stays the same either way. Keep it clean, use new seals, torque it correctly, and do not rush the parts that are hard to see once everything is back together.
Testing Troubleshooting and Final Checks
The last bolt tightened isn’t the finish line. The critical part of fuel injector replacement is what happens in the first few minutes afterwards.
You need to prime the system, start the engine carefully, and inspect every connection like you expect to find a problem. That mindset keeps small mistakes from turning into fire risks or repeat strip-downs.
Prime the system before first start
If you’ve opened the fuel rail or disturbed feed lines, the system needs time to build pressure again. On many vehicles, that means cycling the ignition on and off a few times before cranking. Don’t rush straight into a long crank unless the vehicle procedure specifically calls for it.
Listen during priming. You’re checking for the normal sounds of the fuel system coming back to life, but you’re also giving yourself a pause to spot leaks before the engine runs.
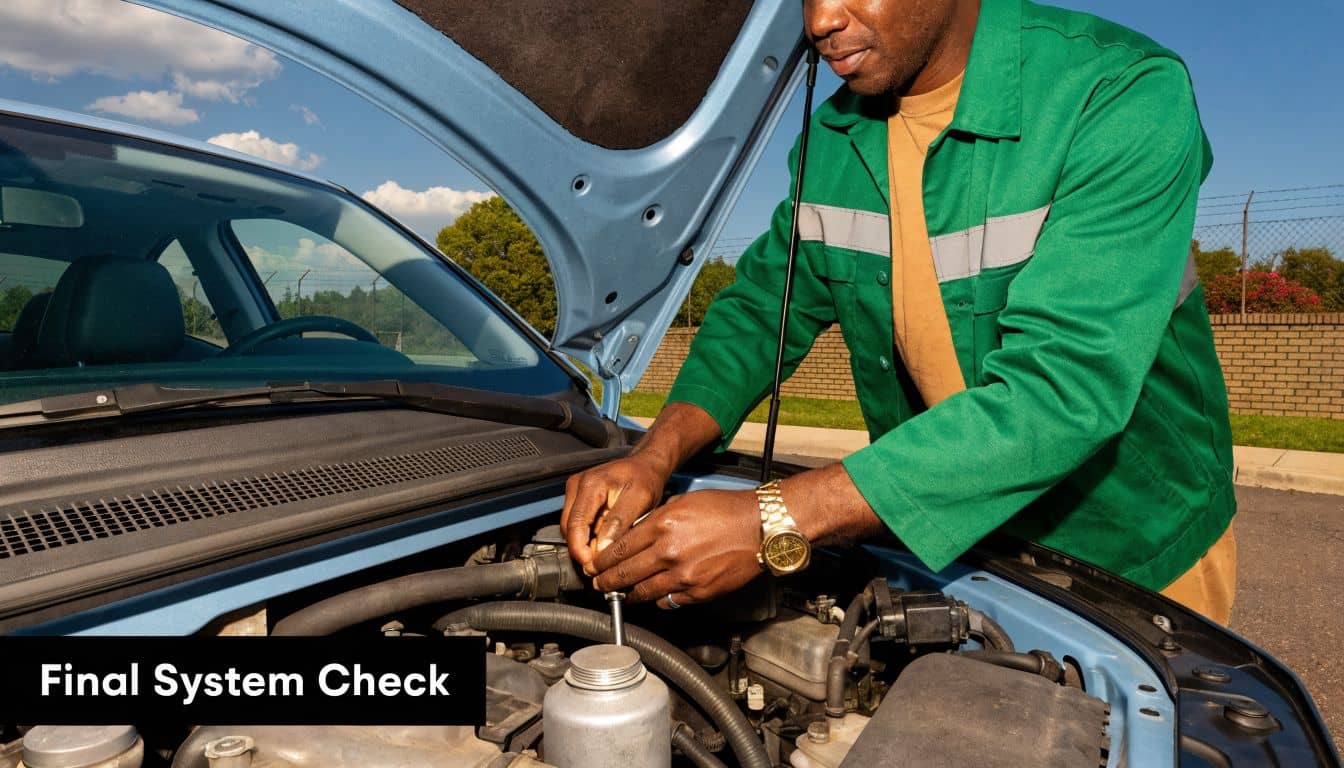
Inspect for leaks immediately
As soon as the engine starts, check all visible injector areas, rail connections and feed points. Use a bright light. Don’t wave your hand around blindly near moving parts. Look for wetness, fresh staining, or the smell of raw fuel.
Professional procedure after injector replacement includes checking carefully for fuel leaks at all connection points, confirming smooth operation, and then driving the vehicle a short distance to verify proper function, as described earlier from the truck service guidance.
If you suspect a leak, shut the engine off and investigate. A minor leak is not minor.
If you can smell fresh fuel after startup, assume there’s a problem until you’ve proved there isn’t.
If it runs rough after replacement
A poor first start doesn’t always mean the new injector is faulty. Usually, the issue is something introduced during the job.
Common causes include:
An electrical connector not fully locked
A pinched or damaged O-ring
Air in the system
A harness disturbed during access
An injector not seated squarely
Injector coding not completed where required
A scanner again earns its keep. Recheck fault codes instead of relying on guesswork. If you disturbed any fuelling sensor connectors during the job, inspect them too. A faulty or disconnected fuel pressure sensor can create symptoms that muddy the post-repair picture.
A practical post-job checklist
Before calling the job done, run through this list in order:
Idle quality: Is the engine now stable and even?
Warning lights: Has any new light appeared after restart?
Leak inspection: Check again after the engine has run for a few minutes.
Road test: Keep it short at first and pay attention to hesitation, misfire or fuel smell.
Recheck after the drive: Open the bonnet again and inspect the injector area a second time.
When the fix improves things but not enough
This happens more often than people expect. The engine runs better, but not fully right.
That usually points to one of three situations. First, you had more than one injector issue. Second, the injector fault masked another underlying problem such as compression loss or ignition weakness. Third, the replacement part is fine but the adaptation or coding side still needs attention.
Don’t let partial improvement fool you into thinking the job is finished. If the symptoms have changed but not gone, the car is still giving you information. Read it properly.
DIY vs Pro: Cost, Risk, and When to Call for Help
A fuel injector job can look cheap on paper. Then one snapped clamp, one damaged seal, or one injector that will not come free turns it into a weekend lost and a bigger bill than the garage quoted in the first place.
That does not mean a capable DIYer should avoid it. It means you should price the whole job, not just the injector.
In the UK, labour is what usually pushes the garage bill up, especially on engines with poor access. The source already cited for UK-specific injector replacement risks and workshop behaviour, Goldfarb’s guide to signs your fuel injector needs replacement, also reflects something we see all the time. Straightforward petrol injector work is one thing. Diesel injectors that are tight in the head, buried under pipework, or likely to need coding are another.
When DIY makes sense
DIY is a sensible option if the job stacks up in your favour:
Access is clear: A simple petrol rail with room to work is far more forgiving than a modern diesel setup.
You already have the right tools: Torque wrench, scan tool if needed, cleaning supplies, and whatever the injector seals require.
You have confirmed the fault: Swapping parts on a hunch gets expensive quickly.
Your engine does not need coding you cannot perform: Some cars are fine with a straight replacement. Some are not.
You can work methodically: Cleanliness matters here because fuel systems do not tolerate dirt.
I usually tell first-time DIYers to be honest about the hidden costs. A set of seals, a few consumables, and maybe one missing tool are normal. Having to recover the car because it will not start after reassembly is where the savings disappear.
When a professional is the better call
Some injector jobs are workshop jobs from the outset.
That is especially true if the injectors may be seized, the seating faces need specialist cleaning tools, or access means stripping off enough parts that one mistake creates three more jobs. The same source notes risks beyond the fitting itself, including emissions issues and potential insurance complications if poor workmanship leaves the car running badly or leaking fuel. For a UK owner, that is not abstract. If your repair causes excess smoke, a management light, or obvious fuelling faults, MOT time can get awkward fast.
A garage is usually the smarter route when:
injectors are known to seize in that engine,
coding or adaptation is required and your scanner cannot handle it,
heavy carbon or dirt around the injector increases contamination risk,
access involves major disassembly,
or you are dealing with high-pressure diesel components and are not fully confident working safely around them.
Paying once for a proper repair often costs less than paying for your own attempt and then paying again for diagnosis, cleanup, and refitting.
Think carefully about replacing one injector or a full set
This catches plenty of owners out. One injector fails, the engine points you to that cylinder, and the cheapest move is to change only that unit.
Sometimes that is the right decision. Sometimes it just buys time.
On some engines, experienced technicians recommend replacing a full set because the remaining injectors are the same age, have the same wear, and will cost the same labour to access later. That is not automatic upselling. It is a judgement call based on failure pattern, mileage, and how awkward the job is. If access is easy, doing one injector can be perfectly reasonable. If access is miserable, you need to weigh the cost of going back in again six months later.
Making the Final Decision
Ask yourself these questions before you order parts:
Can I prove the injector is faulty, rather than likely faulty?
Can I keep everything clean enough during removal and refitting?
Do I have the tools to do the job properly, without making do?
Can I deal with coding, adaptation, or follow-up diagnosis if the engine still is not right?
If one answer is no, that is your decision made.
There is no loss of face in handing the job over before fuel pipes are off and parts are on the bench. Good DIY work is not about doing everything at home. It is about knowing when you can match workshop standards, and when the wiser move is to stop before a manageable repair turns into an MOT problem, a recovery truck, or a fire risk.
If you’re ready to tackle fuel injector replacement, GSF Car Parts is one place to check vehicle-matched parts, workshop tools and service items before you start. Use the registration lookup, confirm the engine details, and make sure the seals, tools and consumables are on the bench before the first connector comes off.