An oil leak sealer is a chemical additive poured directly into your engine oil to fix minor leaks. It works by reconditioning old, brittle rubber seals—critical components in your engine—causing them to swell slightly and regain their flexibility. This is often an effective first-aid solution for slow drips caused by ageing parts, saving you from an immediate, costly repair bill.
What to Do When You Find an Oil Leak
Spotting that dark, oily patch under your car is a moment no driver enjoys. Your mind immediately jumps to expensive garage bills and the headache of being without your car. But hold on—that small puddle on your driveway doesn't always signal a major disaster involving a critical engine component.
For many common, slow leaks, an oil leak sealer can be a surprisingly effective and affordable first response.
Think of it as first aid for your engine's seals and gaskets. Before you rush to book a slot with your local mechanic, it pays to assess the situation yourself. Is it just a few drops overnight, or has your car left a significant pool of oil? The answer will tell you what to do next.
Oil leak sealers are specially formulated to tackle leaks caused by ageing elastomer seals that have hardened and shrunk over time—a very common problem as car parts wear and accumulate mileage.
This simple chart helps you visualise that first decision, based on the size of the leak you've found.

The bottom line is that the severity of the leak dictates the right response. Small drips from weary seals are often something you can manage at home, giving you the power to choose between a simple DIY fix and a professional repair.
When to Use a Sealer and When to Call a Mechanic
Making the right call comes down to understanding which car part is failing. An oil leak sealer is a brilliant tool for rejuvenating specific components, but it’s not a magic cure for every problem. Knowing the difference is crucial for your car's health and your wallet.
So, how do you decide? This quick-glance table breaks down whether a sealer is your best bet or if it's time to get a professional opinion on the faulty part.
Oil Leak Sealer vs. Mechanic Repair: Which Is Right for You?
Situation | Recommended Action | Reasoning |
Small Drips or "Weeping" | Use an Oil Leak Sealer | The leak likely originates from a hardened rubber seal (like a crankshaft seal or valve cover gasket). A sealer is designed to recondition these specific parts. |
Large Puddles | Visit a Mechanic | A significant oil loss points to a serious failure, such as a cracked oil pan or a badly torn gasket that a sealer cannot fix. |
Milky or Foamy Oil | Visit a Mechanic Immediately | This is a red flag that coolant is mixing with your oil, indicating a major failure like a blown head gasket that needs urgent professional repair. |
Visible Cracks in Parts | Visit a Mechanic | A sealer only works on rubber seals. It can’t mend cracks in metal parts like an oil pan, a plastic valve cover, or even a loose fitting like a
. |
Ultimately, a sealer is a fantastic, cost-effective fix for the right kind of problem affecting the right part. But for anything more serious, a trip to the garage is the only way to guarantee a safe and lasting repair.
How Does an Oil Leak Sealer Actually Work?

So, how does this chemical additive actually stop a leak? It’s easy to picture it as a thick, gloopy substance that just plugs up a hole. The reality is much more sophisticated – and a lot gentler on the intricate components of your engine.
A good oil leak sealer isn't a crude patch. Think of it more like a deep conditioning treatment for the hardworking rubber seals and gaskets inside your engine. Its job is to rejuvenate specific car parts, not just block a hole.
Over thousands of miles and countless hot-and-cold cycles, your engine's rubber seals and gaskets wear out. They grow hard, brittle, and shrink, losing the flexibility needed to keep hot, thin engine oil contained. This degradation is where most of those annoying slow drips come from.
The Science of Seal Rejuvenation
When you pour an oil leak sealer into your engine, you're adding a special cocktail of chemicals called plasticisers and conditioners. These additives don’t clog anything up. Instead, they mix with the engine oil and get circulated to every single seal in the system.
The magic happens when these active ingredients meet the elastomer seals—the technical name for the synthetic rubber parts dotted around your engine.
The core function of an oil leak sealer is to be absorbed by dried-out rubber seals. This absorption process causes the seals to gently swell and regain their original flexibility, restoring their ability to create a tight, effective barrier against leaking oil.
This isn’t an instant fix. As you drive, the warm oil carries the sealer around the engine, allowing it to soak into the microscopic pores of the aged rubber parts. The seal gets a "rehydration" treatment, plumping it back up to its original size and shape.
This renewed flexibility lets the seal press firmly against the metal surfaces it's designed to protect, stopping the leak right at its source—the failed component itself. It’s a proper restorative fix, not a temporary patch-up job.
Which Car Parts Does It Actually Fix?
An oil leak sealer is a targeted solution. It’s formulated to work only on specific types of car parts, so it's vital to know what it can and can’t do. This helps manage expectations and makes sure you’re using it for the right problem.
An oil leak sealer is designed to bring elastomer (rubber) seals and gaskets back to life, such as:
Crankshaft Seals: Located at the front and rear of the engine's crankshaft, these rubber seals are common culprits for leaks and respond perfectly to sealers.
Camshaft Seals: Much like crankshaft seals, these stop oil from seeping out of the top end of the engine where the camshafts rotate.
Valve Cover Gaskets: These rubber gaskets sit between the engine head and the valve cover. They are famous for going hard, causing oily residue and that classic burning oil smell.
Oil Pan Gaskets: Often the source of drips on your driveway, this gasket seals the join between the engine block and the oil pan (sump). It's typically made of rubber or cork-rubber blends that a sealer can help restore.
These seals are absolutely critical for engine health and efficiency. In fact, the UK's automotive sealing market is growing, partly because stricter emissions standards demand better-sealed engines. One report projects the United Kingdom Seals and Gaskets Market will grow at a Compound Annual Growth Rate (CAGR) of 4.7% between 2025 and 2031. You can find out more about the growth of this market on 6Wresearch.
What an Oil Leak Sealer Cannot Fix
It's just as important to know the limits. An oil leak sealer is a chemical treatment for flexible parts, not a repair for solid components. It will have zero effect on problems with metal or hard plastic car parts.
Don't expect an oil leak sealer to fix:
Cracked Engine Blocks or Cylinder Heads: These are major mechanical failures in the core structure of the engine that need professional welding or a full replacement.
Cracked Oil Pans: If the metal sump itself has a crack from an impact, it needs to be replaced.
Torn or Sliced Gaskets: If a gasket was ripped during installation or has a major tear, no amount of chemical swelling can bridge that kind of physical gap.
Warped Valve Covers: If the metal or plastic cover is bent and doesn’t sit flat, the gasket underneath can't create a seal, no matter how new or conditioned it is.
By understanding this clear difference between treatable parts and broken ones, you can use an oil leak sealer with confidence for the job it was made for: bringing tired rubber seals back to life and stopping those frustrating slow drips.
Choosing the Right Type of Oil Leak Sealer

When you browse car maintenance products, you'll quickly realise that "stop leak" isn't a one-size-fits-all fix. Your car is a collection of different fluid systems—engine, transmission, power steering—and each one contains parts and seals designed for very specific fluids, pressures, and temperatures.
Grabbing the wrong bottle isn’t just a waste of money; it could actually damage delicate components. That's because every oil leak sealer is carefully blended for a particular job. A formula meant for thick engine oil will do nothing but cause problems in your power steering system, and vice-versa. Understanding the main types, and the parts they protect, is your key to buying with confidence.
Engine Oil Stop Leaks
This is the one most people picture when they hear "oil leak sealer." It’s designed to be poured directly into your engine’s crankcase, where it mixes with motor oil to tackle leaks from crucial rubber seals and gaskets like the crankshaft seals and oil pan gasket.
The science behind it is all about rejuvenating the seals that live in the harsh environment of your engine. These parts have to endure massive temperature swings and constant contact with oil.
Engine oil stop leaks work by reintroducing special chemicals called plasticisers to the old, hardened rubber. This process softens them and restores their flexibility without interfering with the oil’s primary job of lubricating the engine's moving parts. If you're not sure which is right for your vehicle, you can browse a full range of oil treatments on our site.
Transmission Stop Leaks
Your car’s transmission is an incredibly complex piece of hydraulic machinery. It uses a special fluid, Automatic Transmission Fluid (ATF), which is totally different from engine oil. Leaks here usually appear around the output shaft seals, axle seals, or the transmission pan gasket.
Because of this, you need a sealer made specifically for the job. A transmission stop leak is formulated to be fully compatible with ATF, using a different blend of agents that won’t harm the delicate clutches, bands, and valves inside the gearbox.
Using an engine oil sealer in your transmission is a critical mistake. Engine oil additives can contaminate the ATF, causing clutch slip, harsh shifting, and potentially leading to a very expensive transmission rebuild. Always use a product specifically labelled for transmission parts.
Power Steering Stop Leaks
The power steering system is another sealed hydraulic circuit, relying on a thin fluid to make turning the wheel effortless. Leaks from the steering rack, pump, or hoses are common and often start small before getting progressively worse.
Just like the transmission, this system needs its own specialised additive. A power steering stop leak is designed to mix safely with power steering fluid and get to work on the specific rubber compounds used in its high-pressure hoses and seals.
These products bring back suppleness to the seals, allowing them to cope with the constant pressure changes inside the steering system. Given how critical steering components are to your safety, it's vital to fix these leaks quickly with the correct product.
Comparison of Oil Leak Sealer Types
To help you choose, this table breaks down the three main types of sealers and the car parts they are designed to fix. Have a look at the "Best For" column to match the right product to your problem.
Sealer Type | Primary Application | Key Ingredients | Best For |
Engine Oil Stop Leak | Engine crankcase | Plasticisers and conditioners compatible with motor oil | Leaks from crankshaft seals, valve cover gaskets, and oil pan gaskets. |
Transmission Stop Leak | Automatic transmission | Seal swellers formulated for Automatic Transmission Fluid (ATF) | Drips from transmission output shaft seals, axle seals, or pan gaskets. |
Power Steering Stop Leak | Power steering system | Conditioners compatible with power steering fluid | Seeping from steering rack seals, pump seals, or high-pressure hoses. |
Making the right choice really just comes down to identifying which system—and which part—is leaking. Once you've done that, you can confidently pick the right bottle for the job.
How to Safely Use an Oil Leak Sealer Step by Step
So, you’ve identified a leak from a tired seal and you’re ready to tackle it yourself. Good on you. Using an oil leak sealer is a satisfying DIY job that can save you a trip to the garage, but doing it right is everything. A mistake could harm your engine's components.
The secret isn’t just in the pouring; it’s in the preparation. We’ll walk you through it step-by-step to make sure the sealer works effectively on the target parts without any negative side effects.
Essential Preparation Before You Begin
Before you even think about cracking open the bottle, a few checks will set you up for success. Often, the first sign of a leak isn't a puddle on the drive, but a faint burning oil smell – a tell-tale sign that oil is dripping onto a hot part like the exhaust manifold.
First, you need to be sure where that leak is coming from. As we’ve covered, an oil leak sealer is designed to work its magic on specific rubber seals and gaskets. It can’t patch up a cracked metal part, so a quick inspection is vital.
Next, and this is non-negotiable, always work on a cool engine. Engine oil gets incredibly hot and can give you a nasty burn. Park your car on level ground and let it sit for a few hours. This lets the engine components cool and allows all the oil to drain back into the sump.
Finally, get your gear together. You won’t need a massive toolbox for this, but having these items to hand will make the job much easier:
The correct oil leak sealer for your engine.
A clean funnel to avoid spills.
Protective gloves and safety glasses.
An old rag or some paper towels for clean-up.
The correct type of engine oil for your car, for topping up.
With your supplies ready, you’re all set to get started.
A Step-by-Step Guide to Application
Follow these steps in order, and you’ll give the additive the best possible chance of fixing the leak. The single biggest mistake is overfilling the engine, so pay close attention to your oil level on the dipstick.
Check Your Current Oil Level Before adding anything, you need to know exactly how much oil is in the engine. Pull out the dipstick, wipe it clean, push it all the way back in, and pull it out again. Check the level against the 'min' and 'max' marks. This is the most important step for avoiding overfilling.
Calculate the Right Amount of Sealer Read the instructions on the sealer bottle carefully. Most products have a specific treatment ratio, like "one bottle treats 4-6 litres of oil." Your car's handbook will state its total oil capacity. Stick to the recommended dose – adding more won’t make it work faster and could upset the oil’s chemical balance.
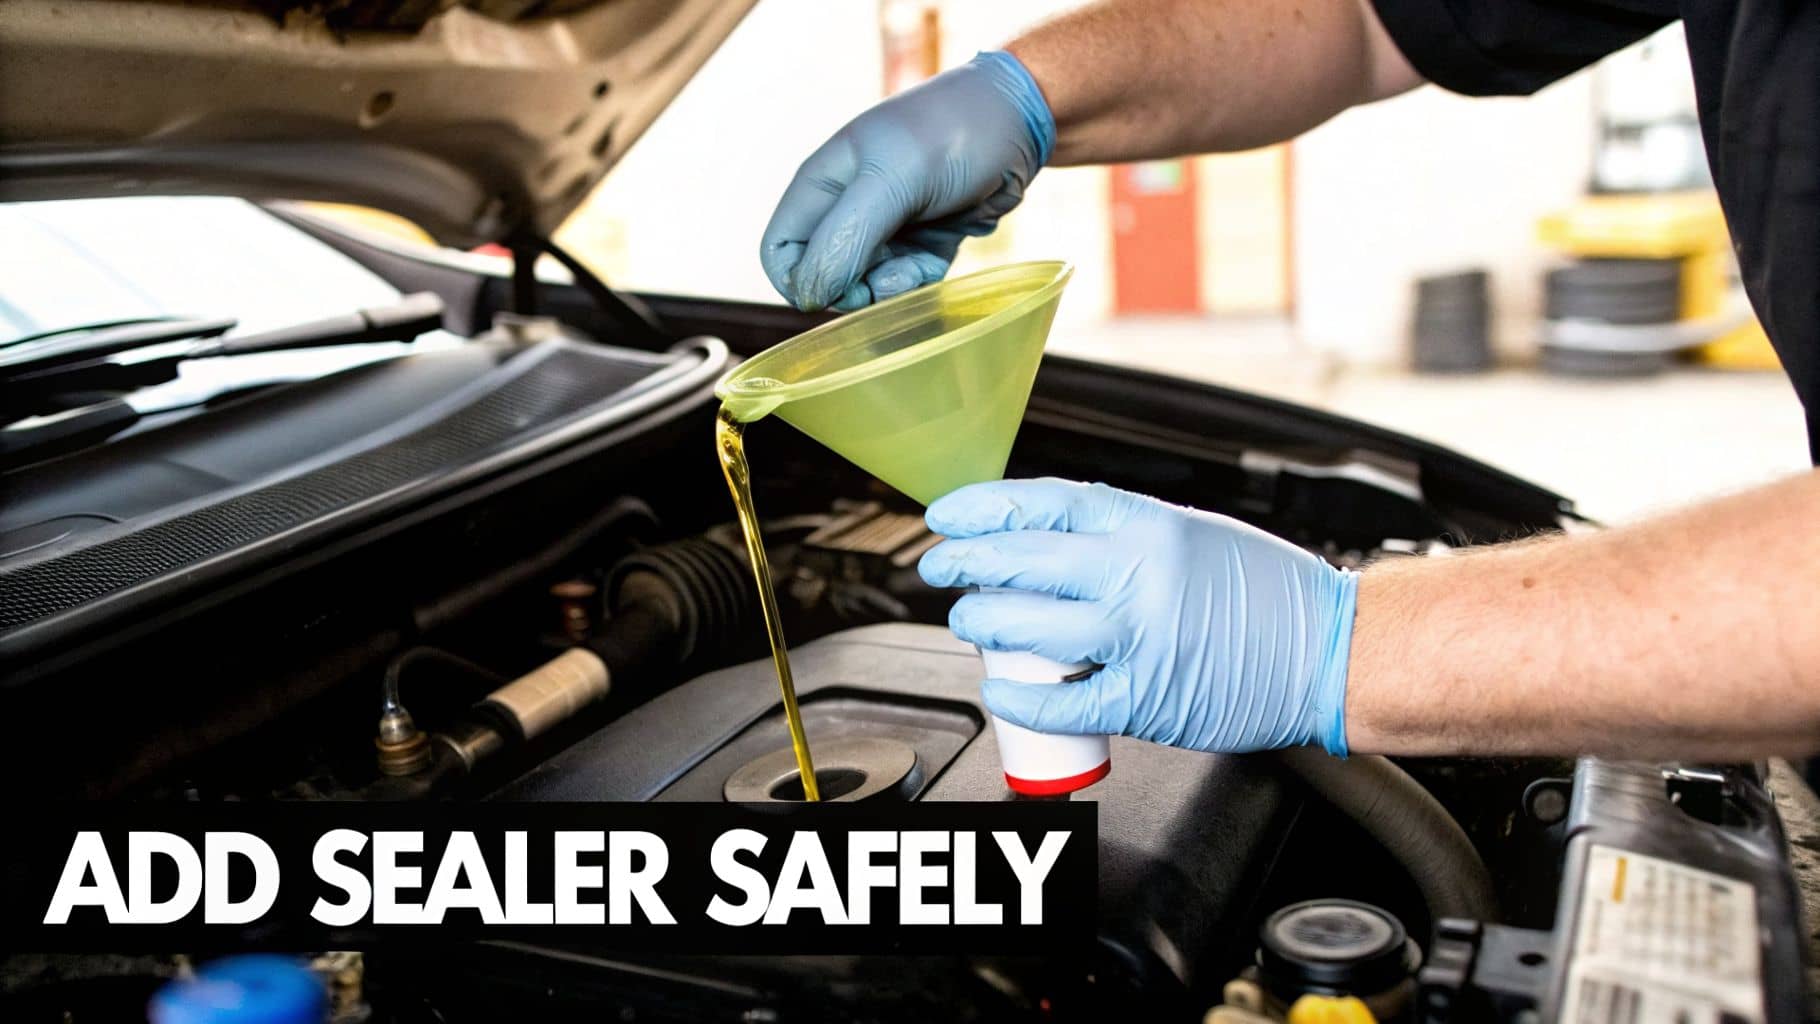
Add the Oil Leak Sealer Find the oil filler cap on top of your engine – it’s usually marked with an oil can symbol. Unscrew it, place your funnel in the opening, and slowly pour the entire bottle of oil leak sealer into the engine.
Top Up With Engine Oil if Necessary After adding the sealer, re-check the oil level with the dipstick. If it’s still below the 'max' line, now is the time to top up with a little fresh engine oil. Add a small amount at a time, checking as you go, to ensure you don’t go over the 'max' mark.
Crucial Safety Tip: Overfilling your engine with oil is a serious mistake. Excess oil can be whipped into a foam by the rotating crankshaft, preventing proper lubrication of internal components and potentially leading to expensive engine damage. Always pour slowly and check the dipstick often.
Drive the Car to Circulate the Additive An oil leak sealer needs heat and circulation to reach the target seals and begin the conditioning process. Start the engine and go for a normal drive for at least 15-30 minutes. Some leaks might take several hours of driving over a few days to stop completely, so be patient while the additive works on the affected parts.
When an Oil Leak Sealer Is Not the Answer
Oil leak sealers are brilliant for specific problems, but they aren’t magic wands for every ailing car part. Knowing when not to use one is just as important as knowing how to pour it in. Reaching for a bottle when you have a serious mechanical failure is like putting a plaster on a broken bone – you’re just hiding the damage, not fixing the root cause.
Spotting the warning signs of a bigger issue will protect your engine's critical components. So, let’s cover the scenarios where you should put the sealer back on the shelf and call a trusted mechanic.
When a Sealer Is the Perfect Fix
First, a quick reminder of where these products truly excel. An oil leak sealer is your best friend when you're tackling slow, age-related leaks from rubber seals and gaskets.
A sealer is the ideal choice for these jobs:
Minor Weeps and Sweats: You’ve spotted a light, oily film building up around a part like a valve cover gasket, but it’s not dripping onto the floor.
Slow Drips: You’re finding a few small spots of oil on your drive in the morning. This is a classic sign of a hardened rubber seal (like a main seal) letting a tiny bit of oil escape.
Older, High-Mileage Engines: As cars age, multiple seals can start to "sweat" oil. A good sealer can help rejuvenate them all at once.
In these situations, the conditioning agents in the formula get to work, softening the rubber and restoring its flexibility to stop the leak.
Red Flags That Demand a Mechanic
Now for the crucial part. If you spot any of the following, an oil leak sealer isn’t the answer. These are all signs of a mechanical failure that needs a professional diagnosis and a replacement part.
1. Rapid Oil Loss and Large Puddles If you’re leaving a large puddle under your car, or the dipstick shows a significant drop in oil over a short period, the leak is too severe for a sealer. This points to a major failure like a completely split gasket, a cracked engine part like the oil pan, or a loose oil filter.
2. Milky or Creamy Coloured Oil Check your dipstick and look inside the oil filler cap. If the oil looks like a frothy coffee, stop driving the car immediately. This is the textbook sign that coolant is mixing with your oil, usually because of a blown head gasket—a critical seal between the cylinder head and engine block. This is a major engine problem that needs urgent repair.
3. Visible Cracks in Engine Components Use a torch to inspect the engine bay. If you can see a physical crack in a metal or hard plastic part like the oil pan (sump) or a valve cover, a sealer won’t do a thing. These products condition rubber seals, not mend broken components. For this kind of damage, you may need a strong gasket compound for a small crack, but a replacement part is the correct fix.
4. Blue Smoke from the Exhaust If you see a steady stream of blue-tinted smoke from your exhaust, it’s a sure sign that oil is getting past internal engine components and being burned. This is typically caused by worn piston rings or failing valve stem seals—issues that an oil leak sealer added to the sump oil cannot reach or fix.
Knowing the difference between a minor weep and a major failure is becoming more critical. In fact, the UK’s leak detection and repair market is expected to grow to a massive USD 2,271.8 million by 2033, partly driven by stricter environmental targets. It shows just how seriously these problems are taken.
By being honest about the limitations of an oil leak sealer, you empower yourself to make the right call. Using the product correctly for the right part saves you money, but knowing when to call a pro saves your engine.
Answering Your Questions About Oil Leak Sealers
Even when you know how these products work, it’s completely normal to feel a bit hesitant before pouring an additive into your engine. You want to be sure you're making the right call for your car's sensitive components.
We get it. That’s why we’ve gathered the most common questions we hear about using an oil leak sealer. Here are some straight-talking, honest answers to help you understand the effect on your car's parts.
How Long Does It Take for an Oil Leak Sealer to Work?
This is usually the first question on everyone's mind. The simple answer is: it’s not instant. An oil leak sealer is a restorative treatment that needs time and heat to work on the affected car parts.
Once you’ve added it to the engine, the sealer circulates with the hot oil. The real action happens over several hours of driving, as the heat and circulation help the conditioning agents get absorbed by the old, hardened rubber seals.
Initial Results: You might start to see the leak slow down after a few hours of normal driving.
Full Effect: For the best results, be patient. It can take a good 200-300 miles of driving for the seals to fully rejuvenate and for the leak to stop completely.
The process is gradual because it’s designed to gently soften and swell the seals back to their original size and shape—a much safer approach for your engine's components than a harsh, rapid chemical reaction.
Is an Oil Leak Sealer a Permanent Fix?
This is a great question. For the exact problem it’s designed to solve—minor leaks from dried-out, brittle rubber seals—an oil leak sealer can be a surprisingly effective and long-lasting solution.
By rejuvenating the seal's material, the fix can last for thousands of miles. But it’s crucial to see it as a repair for a specific part's condition, not a substitute for a part that’s physically broken or past its service life.
An oil leak sealer offers a durable repair for minor, age-related leaks from rubber seals. It is not, however, a permanent substitute for replacing a torn gasket, a cracked metal part, or a seal that is severely degraded beyond the point of restoration.
Think of it this way: if a crankshaft seal has developed a tiny weep because it's gone brittle, the sealer can restore its flexibility and close that gap. But if that same seal has a big tear, no amount of chemical swelling is going to fix it. In that case, the only true permanent fix is replacing the faulty part.
Can an Oil Leak Sealer Harm My Engine?
A very fair question. You're about to add a chemical to your engine's lifeblood, so you want to be 100% sure it won't harm any internal components. The good news is that high-quality oil leak sealer products are designed with engine safety as a top priority.
When used according to the instructions, a quality sealer is completely safe. Here’s why:
Formulated for Compatibility: These additives mix perfectly with all conventional and synthetic engine oils. They won’t interfere with the oil’s primary function of lubricating and cooling engine parts.
No Clogging Agents: A common myth is that sealers contain particles that clog oil filters or narrow oil passages. Modern formulas are liquid chemical agents that fully dissolve into the oil and only react with elastomer seals.
Safe for Components: They are inert towards metal parts, plastics, and other materials inside your engine. The active ingredients are engineered to target only the rubber compounds used in seals and gaskets.
The only real risk comes from not following the directions, like dramatically over-dosing the engine or using a product not meant for that system. Stick to the on-bottle guide, and you can rest easy knowing you aren't harming your engine's components.
Will It Fix a Leak from a Cracked Engine Part?
This is a common point of confusion, and the answer is a hard no. It’s vital to remember that an oil leak sealer is exactly that: a seal restorer.
Its entire job is to rejuvenate flexible, rubber-based parts. The chemicals in the bottle are designed to be absorbed by these materials, causing them to gently swell and soften.
This process has absolutely no effect on:
Metal Parts: It can't mend a cracked oil pan, a warped valve cover, or a damaged engine block.
Hard Gaskets: It won't fix a leak from a solid metal head gasket.
Physical Damage: It can't patch up a gasket that has been sliced, torn, or installed incorrectly.
If your diagnosis points to a leak from a cracked metal part or a physically broken gasket, a sealer won't solve the problem. In those cases, a mechanical repair involving a new part is the only way forward. That's why identifying the leak's true source and the failing component is always the most important first step.
Ready to tackle that annoying oil leak? GSF Car Parts stocks a wide range of trusted oil treatments and sealers to get your car back in top condition. Find the perfect product for your vehicle and enjoy free UK delivery on orders over £25, or Click & Collect in as little as 30 minutes. Visit us online at https://www.gsfcarparts.com to stop that drip today.


