A Step‑by‑Step DIY Guide Using A/C Pro®

Is your car air conditioning blowing warm air when you need cold air the most? Before booking an expensive repair, there’s good news: you can recharge your car’s A/C system yourself with A/C Pro®—no mechanic required.
Your can also follow along with this How-To Tutorial With A/C Pro®
This DIY car A/C recharge guide explains exactly how to recharge your car’s air conditioning system using A/C Pro® and an analog gauge, helping you restore cold air safely, quickly, and confidently.
GSF Car Parts stocks a comprehensive A/C Pro® product range designed for both modern and older vehicles, including those running R‑134a and R‑1234yf refrigerants. Popular A/C Pro® products available at GSF include:
A/C Pro® R‑134a Auto Air‑Con Recharge (510g) – ideal for many pre‑2017 vehicles
A/C Pro® R‑1234yf Auto Air‑Con Recharge (315g) – suitable for most newer vehicles
Reusable Trigger & Gauge systems (R‑134a and R‑1234yf)
Digital Recharge Trigger & Gauge for guided, error‑free filling
A/C Pro® Super Seal Stop Leak (R‑134a & R‑1234yf)
A/C Pro® Auto Air‑Con Cleaner to remove odours and bacteria
Important A/C Recharge Safety Reminder
Before working on your car’s air conditioning system:
Always wear protective gloves
Always wear safety goggles
Proper safety precautions are essential when handling refrigerant.
Step 1: Locate the Low‑Pressure A/C Service Port
With the engine turned off, open the hood and find the low‑pressure A/C service port. This port is located on the larger‑diameter A/C line, typically positioned between the compressor and evaporator.

Once you locate it:
Remove the plastic cap
Set the cap aside for reinstallation later
Tip:
For best A/C recharge results:
Park in the shade
Keep all vehicle doors open (front and rear) during charging
Step 2: Start the Engine and Set the A/C to Maximum
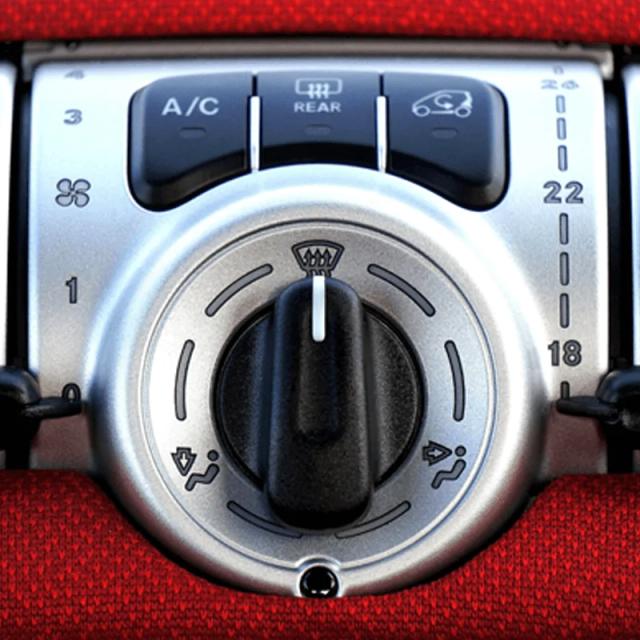
Start the vehicle and adjust the A/C settings as follows:

Fan speed: Highest setting
Temperature: Coldest setting
Mode: Recirculation ON
These settings ensure maximum airflow and proper refrigerant distribution while charging.
Step 3: Attach the A/C Pro® Quick‑Connect Fitting
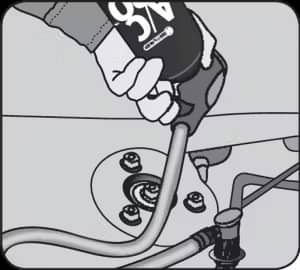
Connect the A/C Pro® quick‑connect recharge hose to the low‑pressure service port:

Pull the connector ring back
Push the fitting onto the port until it clicks securely into place
The A/C Pro® quick‑connect fitting is designed to connect only to the low‑pressure port, eliminating guesswork and preventing mistakes.
Step 4: Check the A/C Pressure Gauge Color
Before squeezing the trigger, read the gauge and note which color zone the needle is pointing to:

Low pressure (below green): Charging required
Green zone: System is properly charged
High pressure (red): Do not charge
The color‑coded gauge makes it easy to know exactly what your A/C system needs.
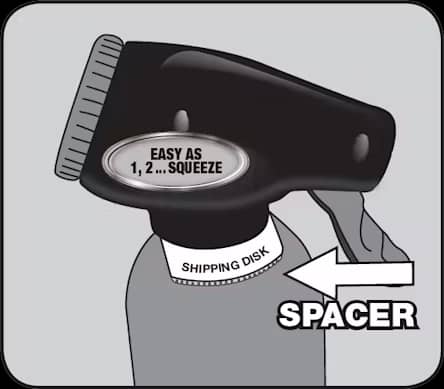
Step 5: Remove the Plastic Storage Spacer
Disconnect the trigger assembly from the service port. Unscrew the trigger assembly from the can and remove the plastic spacer located between the can and the trigger assembly.
This spacer is designed for storage only and must be removed before charging.
Step 6: Recharge the Car A/C System
To begin recharging your car’s air conditioning system:
Shake the A/C Pro® can thoroughly
Screw the can back onto the gauge/trigger assembly
Reattach the quick‑connect fitting to the low‑pressure port
Hold the can upright (12 o’clock position)
Charging Instructions:
Squeeze the trigger to release refrigerant
Shake the can up and down, alternating between 12 o’clock and 3 o’clock positions
Release the trigger every 10–15 seconds
Allow the gauge needle to stabilise before reading pressure
Helpful Tip:
Always read the pressure when the trigger is released, not while squeezing. If the needle fluctuates as the compressor cycles, read the lowest pressure displayed.
Step 7: Stop Charging When the Gauge Reaches Green
Once the gauge needle reaches any point within the green zone, the A/C recharge is complete.
Avoid Overcharging Your A/C System
Do not allow the needle to enter the red zone
Do not attempt to reach the highest part of the green zone
Overcharging can damage your car’s A/C system.

After charging:
Disconnect the hose from the service port
Replace the plastic cap securely
Store unused refrigerant in a cool, dry place with the hose attached
Recharge Your Car A/C with Confidence Using A/C Pro®
Recharging your car’s air conditioning doesn’t need specialist tools or workshop visits. With the A/C Pro® range from GSF Car Parts, you can restore cold air performance at home using professional‑grade products trusted by DIYers and technicians alike.
Find the right A/C Pro® recharge kit, gauge, or stop‑leak solution by visiting: AC Pro at GSF
Skip the mechanic—do it yourself with A/C Pro® and enjoy cold air again.