Cold, damp mornings are when battery trouble usually shows itself. You turn the key, hear a weak click, or get nothing at all, and suddenly a simple trip to work becomes a scramble.
Knowing how to remove car battery safely is one of those basic car jobs that pays off quickly. It can save time, help you avoid damage, and make it much easier to fit the right replacement without turning a flat battery into a bigger electrical problem.
That Sinking Feeling a Dead Car Battery
It usually happens when you need the car most. School run. Commute. Food shop. You get in, switch on, and the dashboard looks tired or dead.
In the UK, battery trouble is common enough that it sits behind a big share of breakdowns. If you're already at the point of replacing yours, learning the removal part properly is worth it. It stops rushed mistakes and gives you a better chance of getting the car sorted in one go.
A dead battery can feel like a garage-only job, but on many cars it isn't. On plenty of everyday hatchbacks, estates and vans, the battery is easy enough to reach and the tools are simple. What matters isn't brute force. It's the order you do things in.
Why this job is worth learning
A battery change is one of the first jobs I tell drivers to understand, even if they don't plan to do every repair themselves. It teaches good habits. Switch everything off. Work methodically. Respect the electrical system.
If the battery has clearly failed and you've already checked you need a replacement, getting the right part matters as much as removing the old one. If you need to match the size and spec, this range of car batteries shows the sort of options available for different vehicles.
A battery job goes wrong when people rush. Slow hands beat fast hands every time.
What catches DIYers out
The mistake I see most often isn't complicated. People undo the wrong terminal first, let a clamp spring back, or start lifting before the hold-down is fully off.
Modern cars add a bit more anxiety because owners worry about settings, warning lights and coded systems. That's fair. Some cars are straightforward, some aren't. The key is knowing which one you're dealing with before the spanner comes out.
Get the prep right, and the job becomes calm and predictable.
Preparing for a Safe Battery Removal
Before you touch the battery, set the job up properly. Most of the risk comes from poor preparation, not from the battery suddenly becoming dangerous on its own.

HSE statistics for 2019 to 2024 recorded 1,450 workplace battery mishandling incidents, with 2.3% resulting in severe burns.
Start with the vehicle, not the tools
Park on level ground. Switch the engine off fully. Remove the key from the ignition or keep the keyless fob well away from the car. Put the handbrake on.
Open the bonnet and give yourself decent light. If the battery is in the boot or under a cover, clear the area first so you aren't fumbling around halfway through.
Practical rule: If you can't see both terminals clearly, you're not ready to start.
The gear you need
A sensible setup is:
Spanner or socket set. A 10mm is the usual starting point.
Gloves. They protect against acid residue, dirt and sharp battery trays.
Eye protection. Especially important if the terminals are crusted with corrosion.
Clean rag or towel. Useful for holding cables away once disconnected.
Small container or magnetic tray. Handy for clamp bolts and hold-down fixings.
Why safety gear matters
A car battery isn't just a heavy box with two posts on top. It contains corrosive acid and can release gas. Most jobs go smoothly, but when something goes wrong, it goes wrong fast.
Do a quick condition check first
Before undoing anything, look for obvious trouble:
Cracks or leaks. If the case is damaged, don't tip or drag it.
Heavy white or blue corrosion. Expect the clamps to be tight or stubborn.
Loose wiring or add-on accessories. Some cars have extra leads fitted to the terminals.
Battery blanket or vent tube. Remove them carefully and remember where they go.
If the battery looks swollen, split, or badly damaged, that's when I'd stop and hand it over to a workshop. Removal is still possible, but the risk rises and the margin for error gets smaller.
The Correct Sequence for Disconnecting and Removing
The order matters more than strength. Once you understand why, the job becomes straightforward.
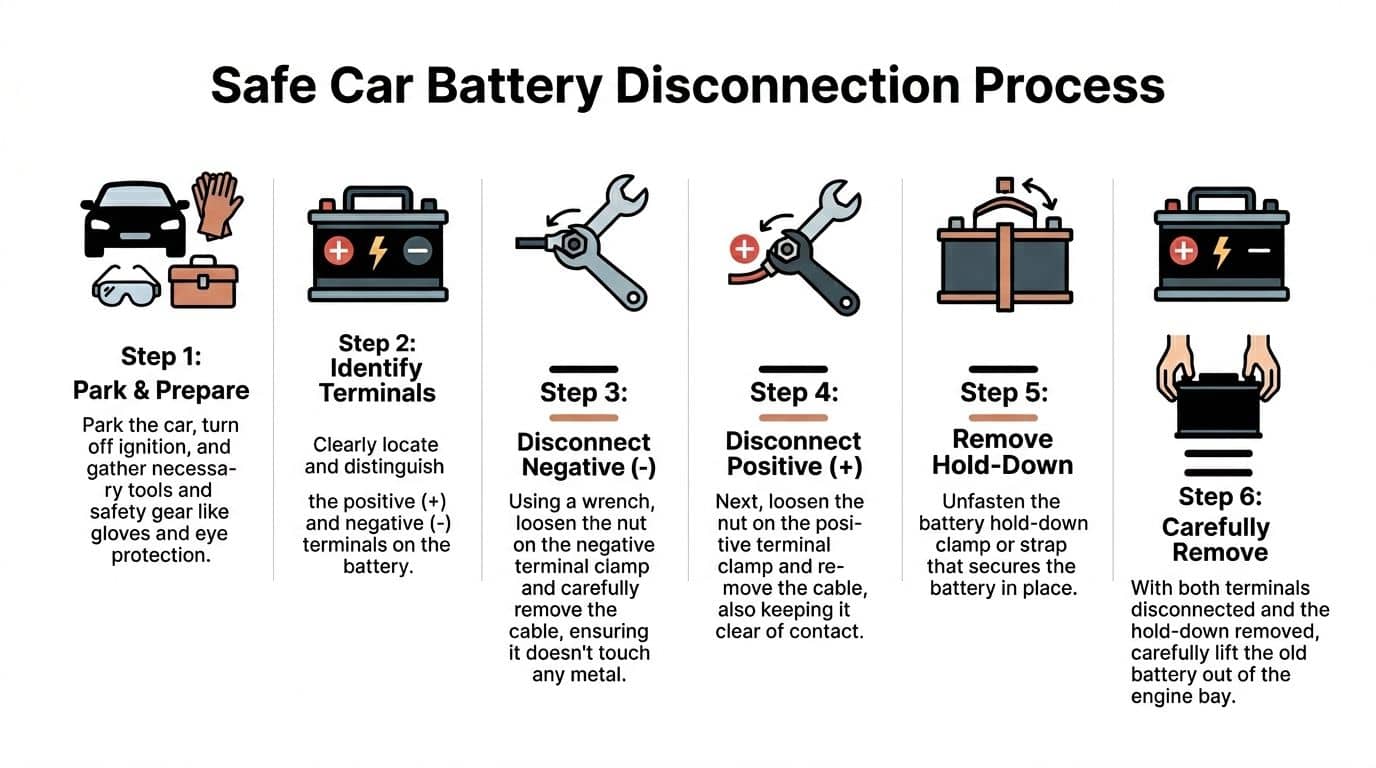
Find the battery and uncover it fully
Most cars keep the battery under the bonnet, usually near one side of the engine bay. Some BMW and Mini models place it in the boot, and some vehicles hide it under trim panels.
Remove any plastic cover before you start. Don't guess where the terminals are. Expose the battery properly so you can see the minus and plus marks.
Disconnect the negative terminal first
This is the golden rule. The negative terminal is usually black and marked with a minus sign.
Loosen the clamp nut, then twist and lift the terminal off the post. Don't yank it upward hard. A small wiggle works better than force.
The reason is simple. On most vehicles, the negative side is connected to the car body. Once it's off, accidental contact between your spanner and metalwork is far less likely to create a direct short.
If a driver only remembers one part of this job, it should be this. Negative off first. Negative on last.
The verified data says to secure the disconnected negative cable away from the battery to avoid a reconnection spark risk. A towel, rag, or zip-tie works well. If the terminal clamp is damaged or badly corroded, it may be worth checking replacement battery terminals before refitting anything.
Disconnect the positive terminal second
Once the negative lead is safely clear, move to the positive terminal. That's usually red and marked with a plus sign.
Loosen the clamp and lift it free. Keep your tool under control and don't let it bridge across metal parts. The verified data notes that sparks can reach up to 500°C and that positive-first removal is a common novice error.
A calm approach works best here. If the clamp doesn't lift, don't lever against the battery case. Twist gently and work it upward.
Here’s a visual walkthrough if you prefer to see the process in motion.
How to Change Your Car Battery
Remove the hold-down clamp or bracket
A battery should never sit loose in its tray. Most are held by a top clamp, side wedge, or metal bracket at the base.
Undo the retaining bolts and put them somewhere safe immediately.
A quick check before lifting:
Check | Why it matters |
Both terminals clear | Stops snagging and accidental sparks |
Vent tube removed if fitted | Prevents damage on sealed setups |
Clamp fully off | Avoids cracking the battery case |
Tray area visible | Helps spot corrosion or debris |
Lift the battery out properly
A car battery is awkward weight. The verified data puts the average at 15 to 25kg and says DIY lifting injuries account for 10% injury rate in DIY lifts,.
Use both hands. Keep the battery upright. Bend your knees, not your back.
Don't tip it for convenience. Don't rest it on painted bodywork. If the engine bay is tight, lift slowly and watch every corner.
Three mistakes that cause most of the grief
Undoing positive first. That's the classic spark-maker.
Letting a loose clamp fall back. A cable that springs back into contact can catch you out.
Bridging with a spanner. One careless movement across terminal and metal can turn a simple job nasty.
Most battery removals are easy when the sequence is followed exactly. Problems usually start when someone thinks they can skip a step because they've "almost got it."
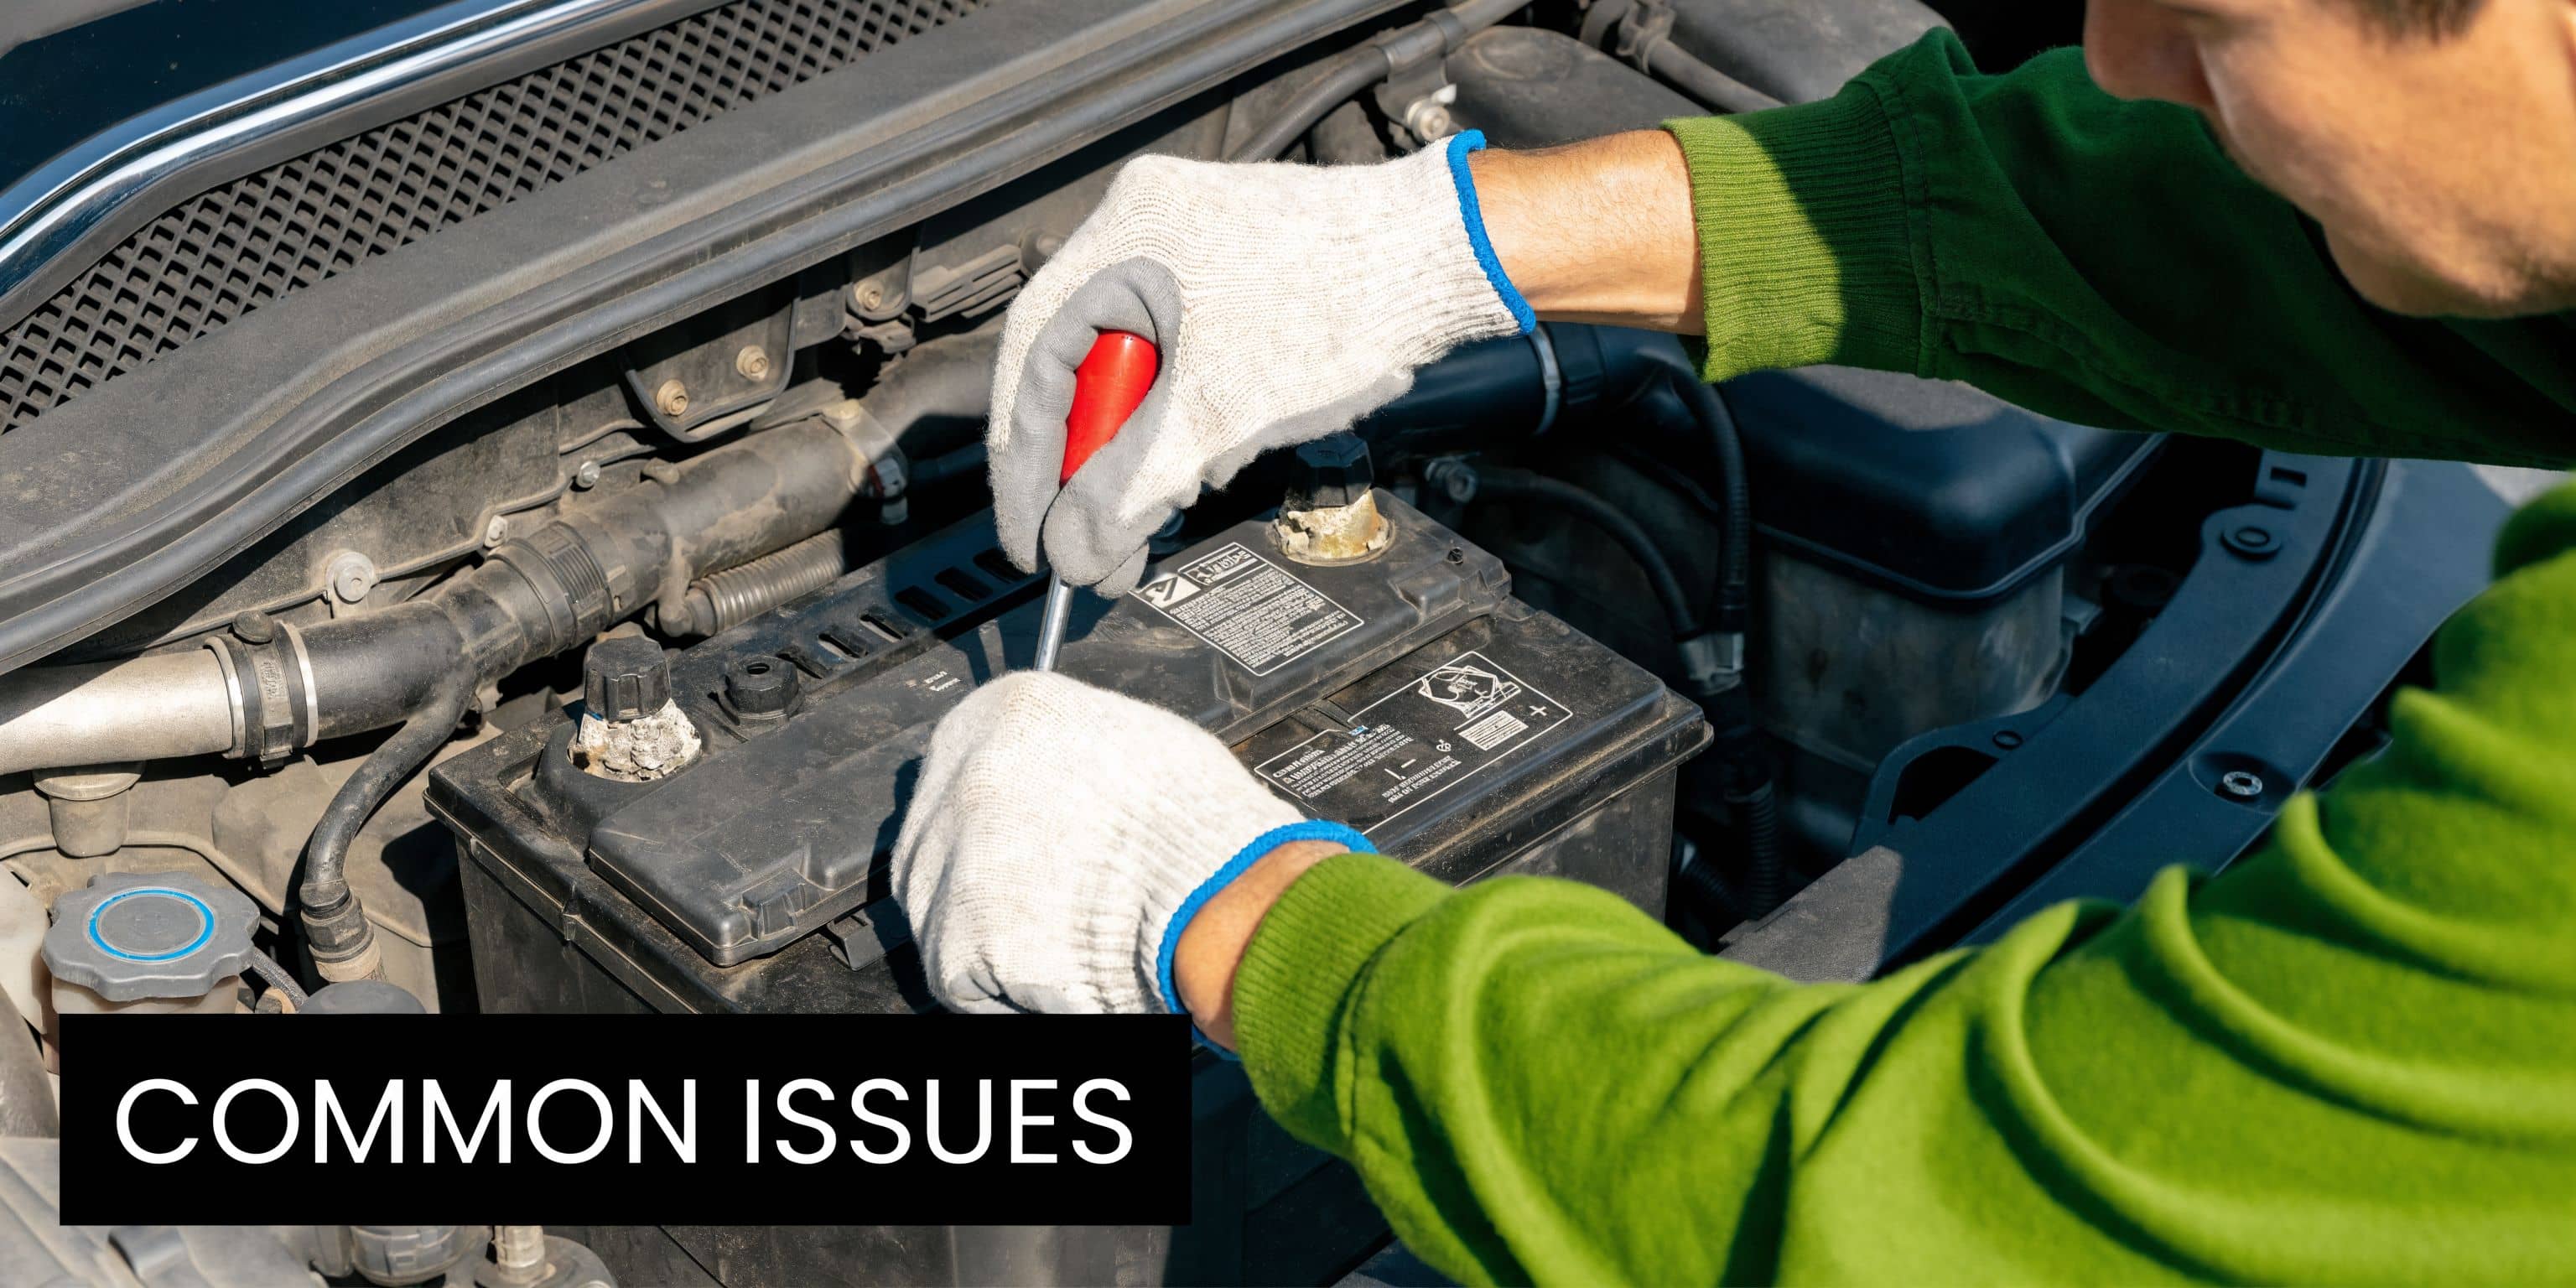
Dealing with Common Issues and Modern Vehicles
A clean battery on an older hatchback is one thing. A corroded battery on a modern start-stop car is another.
According to autopart UK battery removal practices says injury rates have fallen 62% from 1990s levels, from 3,500 annual HSE-reported cases at the peak to 1,320 today, and that 92% of UK garages recommend negative terminal first. It also states that shorting positive first causes 75% of 2,500 yearly electrical fires in garages.
When the terminal won't budge
Corrosion is the usual culprit. You'll often see white, chalky build-up around the post and clamp. That residue can lock the terminal in place and make a simple lift-off feel impossible.
Don't attack it with brute force. Work the clamp side to side. If needed, clean the area first and take your time.
The same verified data says 70% neglect terminal cleaning, leading to 18% failure rates within 6 months in the cited test data, and recommends a baking soda solution for neutralising acid residue, referenced at https://www.autozone.com/diy/battery/how-to-change-battery-in-key-fob.
A practical approach:
Brush first. A wire brush removes loose corrosion before you start twisting.
Use baking soda solution carefully. It helps neutralise acid residue around the clamp area.
Dry the area. You don't want wet residue hanging around the tray or terminals.
Check the clamp shape. If it's distorted, it may never tighten properly again.
Corrosion fools people. The clamp looks loose enough, but the build-up underneath still has it stuck solid.
Start-stop systems and battery monitoring
Modern vehicles are less forgiving than older ones. If your car uses start-stop, a battery sensor on the negative lead, or a battery management system, treat the job more carefully.
Some cars need the replacement battery to match the original technology exactly. That usually means paying attention to the existing battery type and not dropping in a different one just because the size looks close.
Memory loss, radio codes and electronic oddities
This is the bit many drivers worry about, and rightly so. When power is fully disconnected, some vehicles can lose radio presets, trip data, clock settings, window calibration, or stored convenience settings.
A memory saver can help on cars that are known to be fussy. It supplies temporary low-current power while the main battery is removed. Used properly, it can reduce the chance of losing stored settings. Used carelessly, it can complicate the job, so it isn't something I'd recommend to a first-timer unless the vehicle clearly benefits from it and the method is understood.
If the owner manual mentions a radio code, anti-theft coding, battery registration, or window reset procedures, stop and read it before disconnecting anything. That's time well spent.
A quick decision guide
| Situation | DIY is usually fine | Better to pause | |---|---| | Easy access battery | Yes | | | Minor surface corrosion | Yes, with cleaning | | | Heavy case damage or leaking battery | | Yes | | Start-stop or battery sensor fitted | Maybe, if you're confident | Yes if unsure | | Battery buried under trims or braces | | Often yes |
The smartest DIYers aren't the ones who force every job through. They're the ones who know when the car in front of them needs a bit more caution.
Installing the New Battery and Responsible Disposal
Once the old battery is out, the refit is mostly the reverse. Mostly, not entirely. The reconnection order matters just as much as the disconnection order did.
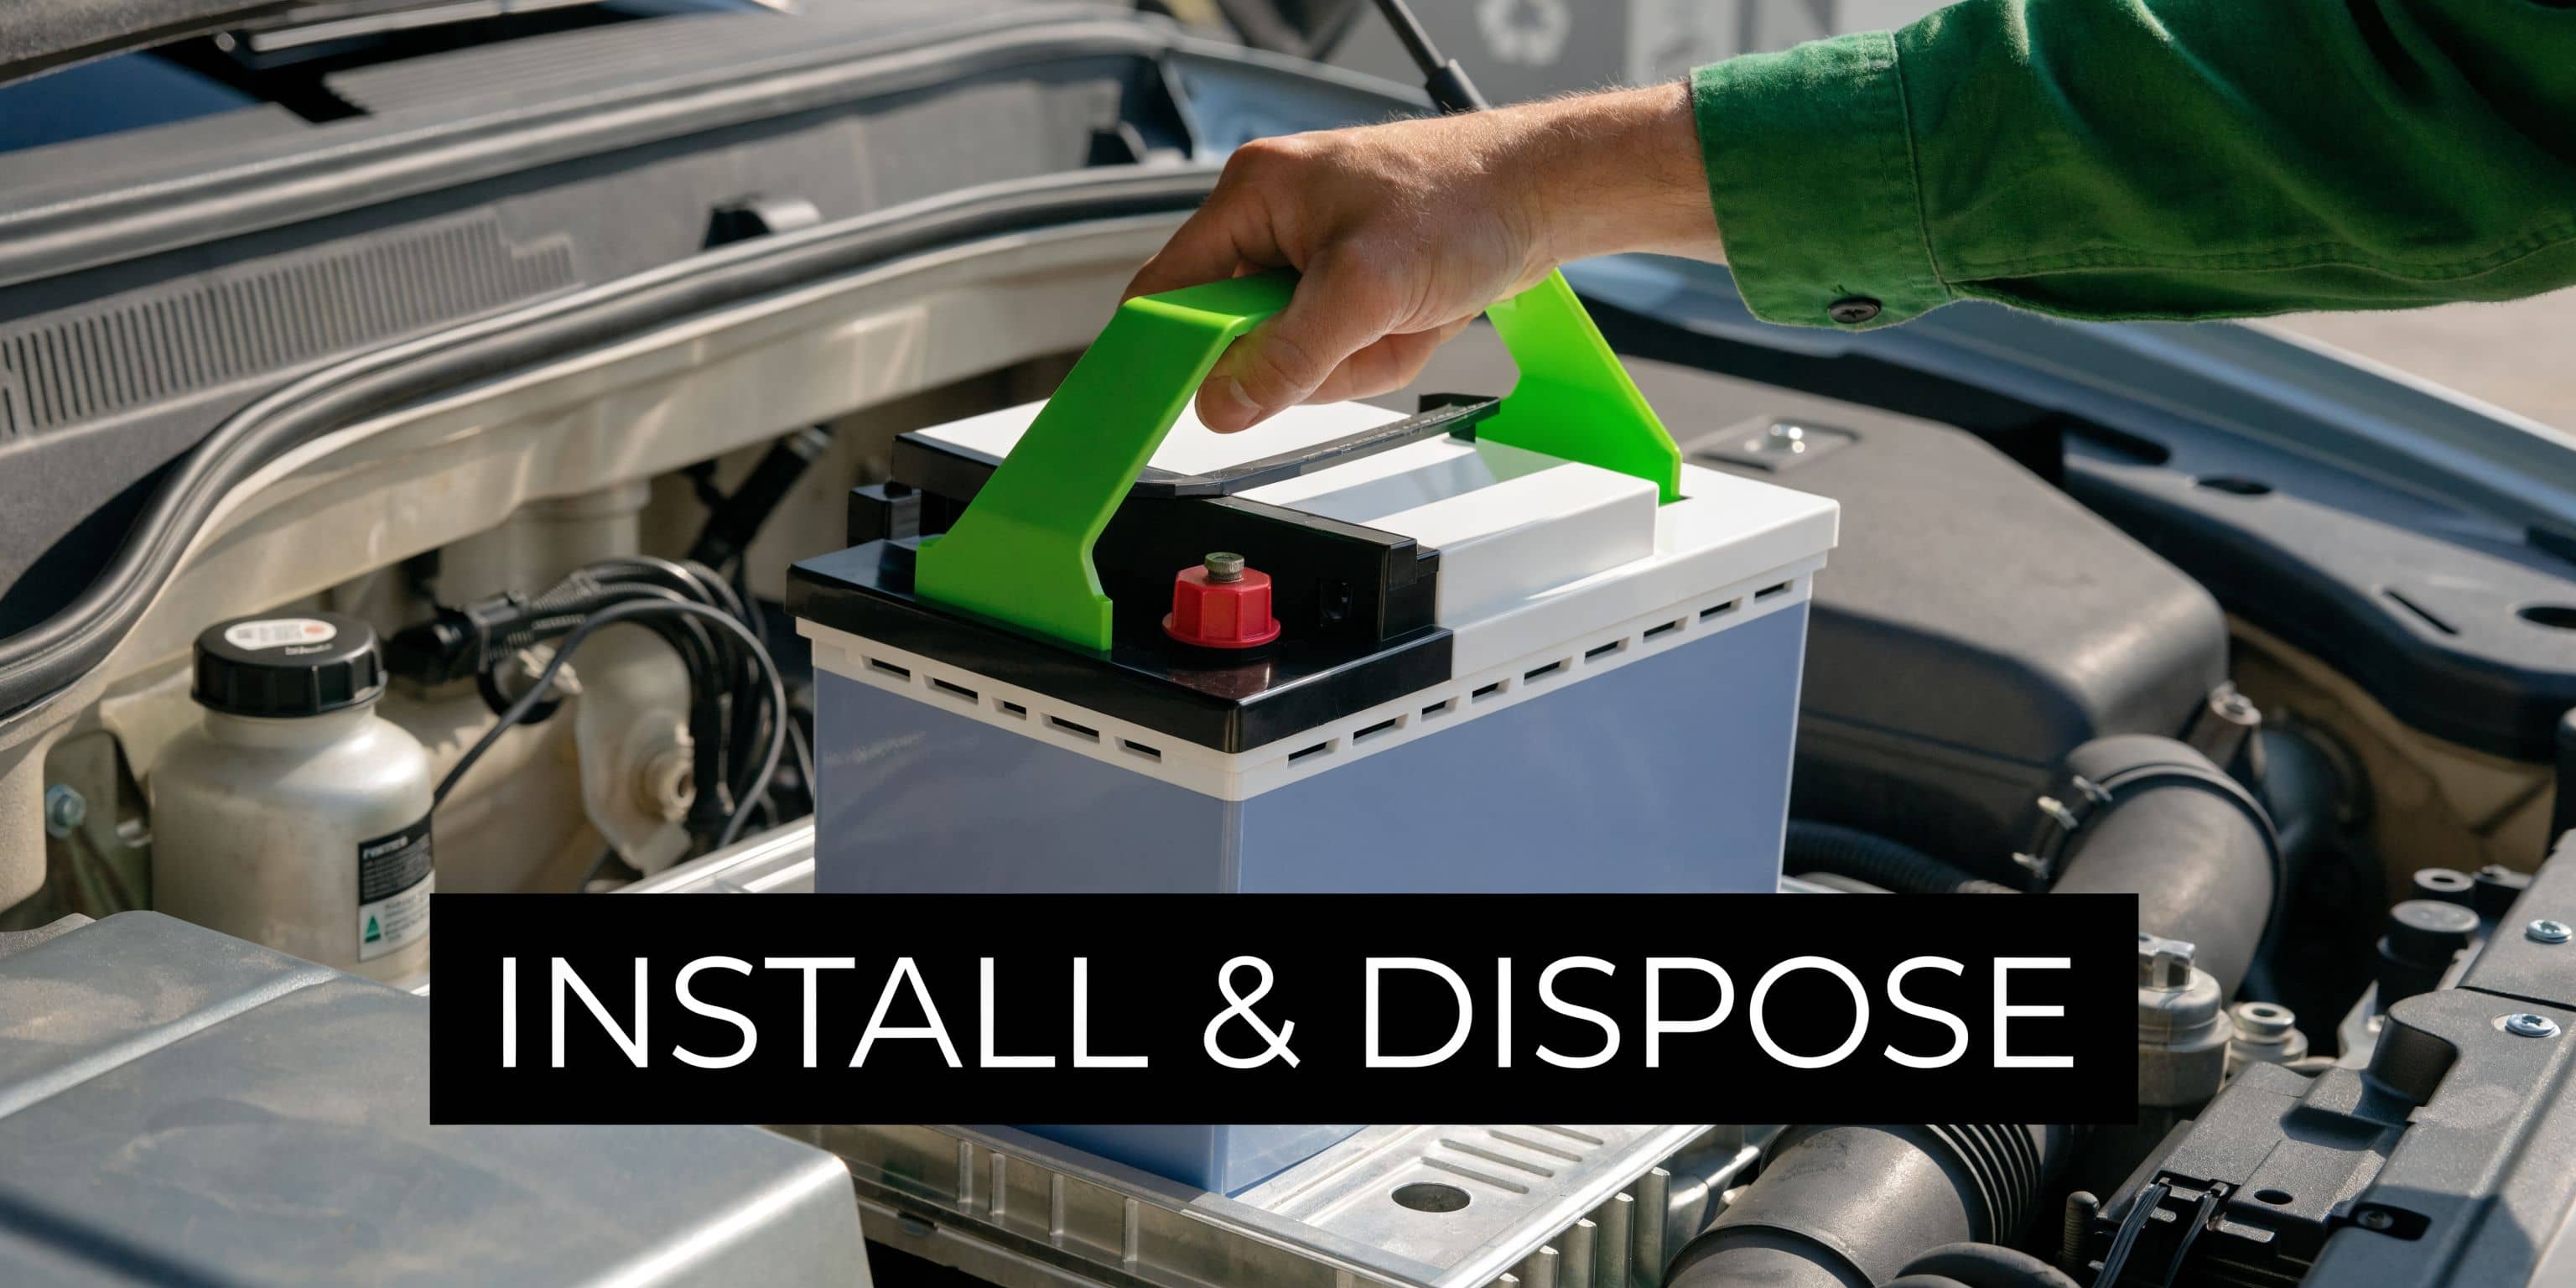
Seat the battery properly
Lower the new battery into the tray without tilting it more than necessary. Make sure it sits flat and the posts are oriented the same way as the old one.
If the battery tray has dirt, old corrosion, or loose debris in it, clean that out first. A poor seating position can strain the clamps and make the hold-down impossible to fit correctly.
Secure it before reconnecting
Always fit the hold-down clamp or bracket before tightening the terminals. If the battery can move, the terminals and case take the strain.
Check these points as you go:
Battery sits flat. No rocking in the tray.
Hold-down is fully engaged. The battery shouldn't shift when pushed gently.
Vent tube is reconnected if used. Some batteries require it.
Cables reach naturally. No stretching or twisting.
Reconnect in the reverse order
For installation, go positive first, then negative. That's the safe reverse of removal.
Fit the positive terminal onto the post and tighten it snugly. Then fit the negative terminal last. That way, the body of the car doesn't become part of an accidental short circuit while you're still working on the live side.
I also like to make sure the clamps are secure without over-tightening. You want firm contact, not crushed posts.
A battery that starts the car but has loose clamps isn't fixed. It's waiting to fail again.
A light coating of terminal protector or petroleum jelly on the finished connection can help resist future corrosion. If the battery has been run flat by lack of use rather than outright failure, a proper battery charger may be worth having on hand for maintenance between trips.
Final checks before you shut the bonnet
Turn the ignition on and check the basics. Dash lights, windows, central locking, radio and clock are the usual first checks.
If the car starts cleanly and nothing looks loose, you're in good shape. If you get warning lights, don't panic straight away. Some cars need a short drive cycle or a simple reset procedure after power has been disconnected.
Dispose of the old battery properly
An old battery never goes in household waste. It contains hazardous materials and needs proper recycling.
Take it to an authorised recycling point or parts counter that accepts used batteries. Keeping it upright in transport is sensible, and putting it in a tray or sturdy box saves your boot lining from any residue.
Responsible disposal isn't just tidy workshop behaviour. It's part of doing the job properly from start to finish.
Know When to Call for Professional Help
Some battery jobs are ideal for DIY. Others aren't worth forcing.
If the battery is hidden under major trim panels, buried beneath scuttle covers, tied into a complex battery monitoring setup, or fitted to a hybrid or electric vehicle, I'd strongly consider handing it to a professional. Those systems can be less forgiving, and the cost of one mistake is much higher than the cost of asking for help.
The same goes for damaged batteries. If the case is leaking, swollen, or heavily compromised, safety comes first. Don't wrestle with it to prove a point.
There's no shame in drawing the line. Good mechanics do it too. The goal isn't to do every job yourself. The goal is to do the right job safely, with the right information, and stop before a simple battery change becomes an electrical or safety headache.
If you're replacing a battery and want the right part, tools, or workshop consumables, GSF Car Parts is one practical place to check. You can use the registration lookup to match parts to the vehicle, then order online or collect from store if you need to get the car back on the road quickly.


