


That noise usually starts the same way. You press the brake pedal at the end of a normal trip, and instead of a clean, quiet stop, you get a squeal, a scrape, or a harsh grinding sound that tells you something isn’t right.
A lot of drivers hear that and immediately think garage bill. Fair enough. Brakes are safety parts, and nobody wants to get them wrong. But if you’re methodical, use the right tools, and understand why each step matters, learning how to change brake pads and discs is one of the most useful jobs you can do at home.
The ultimate benefit isn’t just saving money. It’s knowing what you fitted, how it was installed, and why the brakes now feel the way they do. That knowledge helps you choose better parts next time, spot wear earlier, and avoid the common mistakes that turn a simple service job into a comeback repair.
Understanding Your Brakes and Why DIY is a Great Option
The brake system is simple in principle. You press the pedal, the hydraulic system moves the caliper piston, the brake pads clamp the disc, and friction slows the car. In practice, small details make a huge difference. Pad material, disc condition, smooth slider movement, proper torque, and clean mounting faces all affect noise, feel, and stopping performance.
Why pads and discs are usually done together
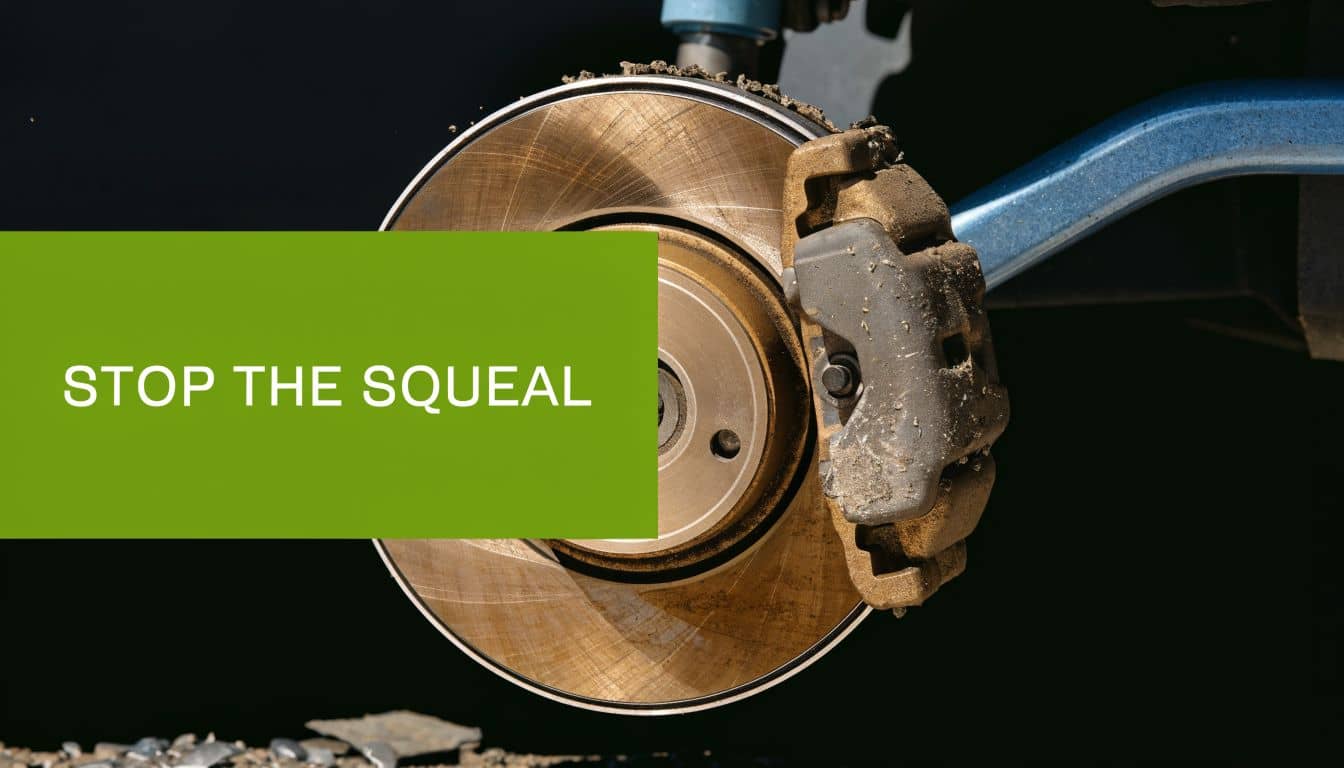
Pads wear against the disc face. If the disc is grooved, corroded, heat-marked, or close to minimum thickness, fitting fresh pads against that old surface is a compromise from the first mile.
You can sometimes replace pads alone, but it only makes sense when the disc is in good shape and well within spec. On many everyday road cars, changing both together is the cleaner job and gives the new pad a proper surface to bed into.
Practical rule: If the disc face is badly scored, lipped, or below minimum thickness, don’t try to save it with new pads.
Why DIY appeals to sensible owners
A home brake job isn’t about pretending every car is easy. Some are not. Rear brakes with electronic parking brakes, seized disc screws, rusted carriers, and awkward caliper designs can all slow you down.
But on a straightforward car, this is one of the jobs where careful DIY makes sense. You get time to inspect everything properly, clean what should be clean, lubricate what should move, and reject parts that don’t look right before they ever go on the car.
There’s also a practical cost angle. According to a brake replacement guide citing UK-specific data, brake disc thickness below minimum limits caused 7.2% of all MoT failures, and UK DIYers can source parts through GSF Car Parts’ 200+ stores with Click & Collect in 30 minutes, with parts priced up to 50% below dealers and backed by a 4.5/5 rating from over 50,000 reviews.
What works and what doesn’t
A first brake job goes well when you treat it like precision maintenance, not a race.
What works:
Cleaning every mating surface
Checking the old parts before binning them
Using a torque wrench
Replacing hardware when supplied
Taking your time on the first side
What doesn’t:
Hanging the caliper by the hose
Smearing grease everywhere
Forcing pistons back with the wrong tool
Ignoring left-to-right wear differences
Skipping bedding-in because the car “stops fine”
If you approach the job with patience, it’s one of the most satisfying ways to get more confident around your car.
Preparation The Key to a Safe and Successful Brake Job
The best brake jobs feel almost boring. That’s a good sign. It means the car is secure, the tools are ready, and nothing is being improvised halfway through.
Secure the car properly
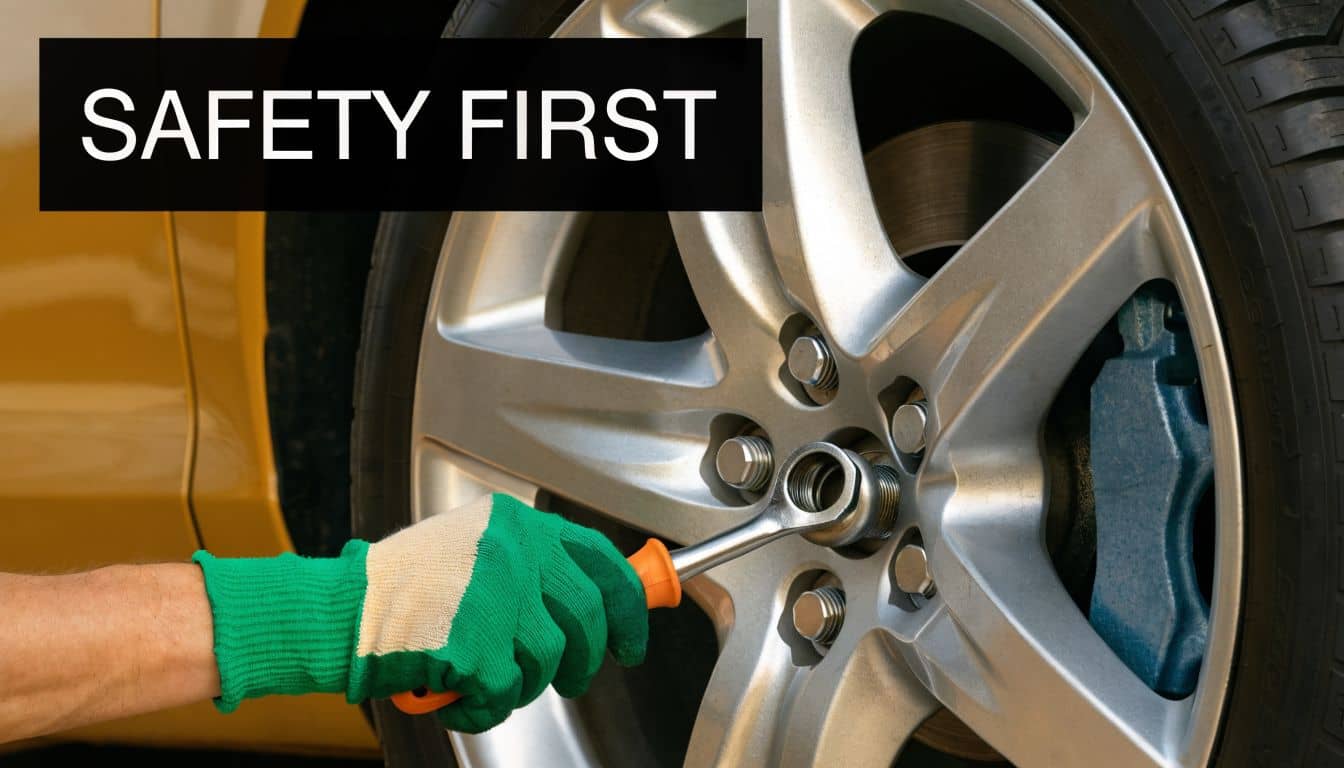
Start on level ground. Leave the car in gear or Park, apply the handbrake if you’re working on the front axle, and chock the wheels that stay on the ground.
Loosen the wheel bolts before lifting the car. Then raise it and support it on axle stands. Never trust the jack on its own.
If you need proper support equipment, use a stable set of axle stands. They’re not optional on brake work. You’ll be pulling on fasteners, and the car must stay planted.
The safest brake job is the one where you can stop and think, because the car is fully supported and not shifting under you.
Gather the tools before you start
You don’t need a full workshop. You do need the right basics.
A sensible brake kit for the home mechanic includes:
Socket set and breaker bar for wheel bolts, caliper bolts, and carrier bolts
Torque wrench for correct reassembly
Brake piston tool or wind-back tool depending on caliper type
Wire brush for hub and carrier cleaning
Brake cleaner for discs and hardware
Bungee cord or caliper hook to support the caliper
Flat screwdriver or pry tool for clips and old pads
Hammer or mallet for stubborn discs
Protective gloves and eye protection because brake dust and rust flakes are no joke
Some cars also need hex bits, Torx bits, or a separate disc retaining screw tool. Check that before you begin, not after the wheel is off.
Choose the right parts, not just parts that fit roughly
At this stage, a lot of people either save the job or sabotage it.
You need pads and discs matched to the exact vehicle. Engine size, trim level, VIN split, brake system manufacturer, and axle setup can all change the part. Two cars that look identical from ten feet away can use different discs.
When choosing parts, check:
Item | What to confirm | Why it matters |
Disc size | Diameter and thickness | Wrong size won’t fit the caliper correctly |
Pad shape | Backing plate design and sensor provision | Prevents fitting issues and warning light problems |
Axle position | Front or rear | Pads and discs are not interchangeable |
Brake system type | Standard, vented, integrated handbrake rear setup | Affects both fit and installation method |
Compliance marks | ‘e’ mark or UK equivalent | Helps avoid non-compliant parts |
Post-Brexit, replacement brakes in the UK must display an ‘e’ mark or UK equivalent to comply with the General Safety Regulation, and 12% of brake failures are linked to substandard imports according to the DVSA’s 2025 report. The same source notes the UK’s wet climate leads to 25% higher corrosion rates, which is why cleaning hub surfaces with a wire brush matters far more than many generic guides admit (UK brake compliance and corrosion guidance).
Inspect before ordering if you can
If time allows, pull a wheel and look. Confirm whether the car has vented or solid discs, check pad wear patterns, and note anything odd like leaking calipers, damaged hoses, or missing anti-rattle hardware.
This also helps you decide whether you need extra consumables:
Brake cleaner
High-temperature silicone-based brake grease
New pad fitting clips or shims
New disc retaining screws if yours are corroded
Brake fluid if the system needs attention
Deal with rust before it becomes a fitting problem
UK cars live in damp conditions. Even a tidy car can have a disc that’s welded itself to the hub with corrosion.
Before you start the removal, expect these common issues:
Hub rust that stops the new disc sitting flush
Carrier corrosion that pinches new pads in place
Seized disc retaining screws
Guide pins that move, but not smoothly enough
The fix is patient prep. Clean the hub face, clean the carrier lands, and inspect the guide pins before reassembly. A new disc fitted onto a rusty hub won’t run true, and that’s how people end up blaming “warped” parts for what was really poor preparation.
Read the box and compare old to new
Before fitting anything, open the new parts and compare them with the old ones side by side.
Check the basics:
Disc offset and diameter
Pad shape and thickness
Clip and shim layout
Sensor location if fitted
If something looks off, stop there. Don’t “make it fit”. Brake parts should fit cleanly and obviously.
Your Step-By-Step Guide to Replacing Pads and Discs
This is the eagerly awaited step, but the trick is not rushing it. The first side is your learning side. The second side is usually quicker because you’ve already seen how the parts stack together.
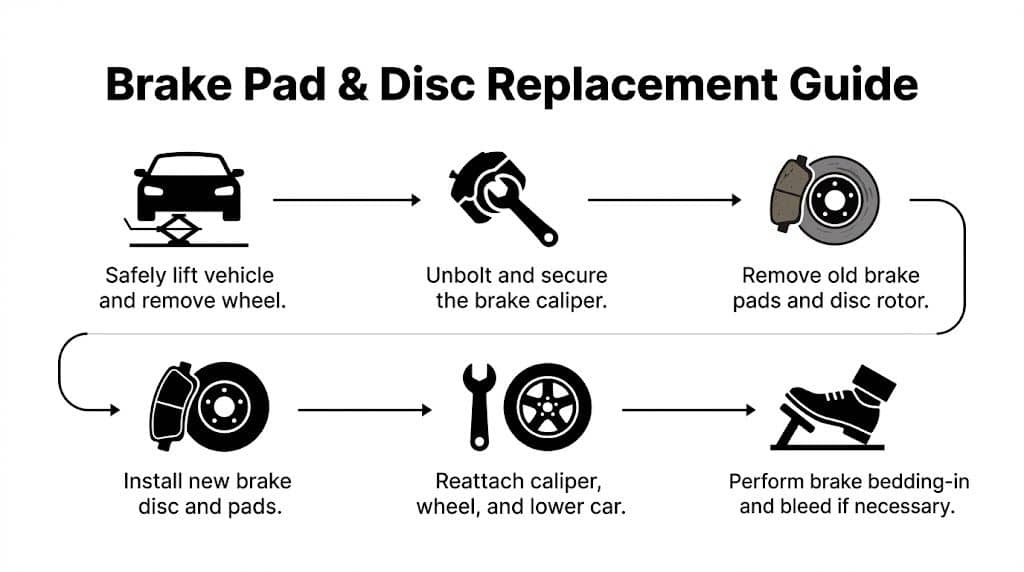
Lift, remove, and inspect
With the wheel off, turn the steering for better access on the front if needed. Look at the whole assembly before touching anything.
You’re checking for three things straight away:
How the pads sit in the carrier
Where the caliper bolts and carrier bolts are
Whether anything is already wrong, such as split dust boots or fluid leaks
If the outer pad is worn far more than the inner, or vice versa, don’t ignore it. Uneven wear often points to sticking sliders or piston issues.
Remove the caliper and support it
Undo the caliper bolts and slide the caliper away from the disc. Don’t let it hang on the flexible brake hose.
Use a hook, cable tie, or bungee cord to support it from the spring or a solid suspension point. Supporting it properly protects the hose and gives you both hands free.
If you remember one habit from this job, make it this one. The hose carries hydraulic pressure. It is not a caliper hanger.
Take out the old pads and any clips or shims. Keep the hardware laid out in order if you’re reusing any of it.
Check slider movement and hardware condition
Before you touch the disc, inspect the carrier and guide pins. The caliper has to move freely so both pads apply evenly.
Pull the guide pins, wipe them clean, and check the rubber boots. If the pins are dry, corroded, or stiff, clean them and relubricate with the correct grease.
For fresh hardware, a proper brake pad fitting kit is worth having. Old clips often look fine until they start causing pad drag or rattles.
Remove the carrier and old disc
Most cars need the caliper carrier removed before the disc comes off. These bolts are usually tighter than the caliper slider bolts, so use a solid socket and steady pressure.
Once the carrier is off, remove the disc retaining screw if fitted. If the screw is stuck, use the correct bit and keep it square. If the disc still won’t move, strike the disc hat area with a hammer or mallet to break the corrosion bond.
Sometimes the disc comes off in seconds. Sometimes it takes persuasion. That’s normal.
Clean the hub face properly
This step decides whether the new disc sits true.
Use a wire brush to clean the hub face until it’s free of flaky rust and raised corrosion. You’re not polishing it for looks. You’re making sure the new disc mounts flush.
Run your fingers over the face carefully. If you can feel bumps, the disc can too.
A light smear of suitable anti-seize on the centre spigot can help prevent future seizure, but keep friction surfaces clean. Nothing should contaminate the disc face or pad material.
Clean the new disc before fitting
New discs often have a protective coating or oily film from storage. Spray both sides with brake cleaner and wipe them thoroughly.
Fit the new disc to the clean hub and secure the retaining screw if used. Spin it by hand. It should sit flat and rotate without wobble.
Retract the piston the right way
Errors are common during DIY brake jobs. A common pitfall is improper caliper piston retraction, which accounts for 28% of UK DIY brake failures. For many post-2000 cars with integrated ABS, a brake wind-back tool is essential, and the recommended lubricant is a silicone-based, high-temperature synthetic grease on guide pins and pad ears only, never copper anti-seize in these areas because it can cause issues in wet UK conditions (piston retraction and brake grease guidance).
Before pushing the piston back, check the brake fluid reservoir under the bonnet. If the fluid is already near the top, retracting the piston can force it to overflow.
Front caliper pistons on many cars push straight back. Rear pistons on many cars need to be rotated and wound back because of the handbrake mechanism. If you force a wind-back piston straight in with a clamp, you can damage the caliper.
Prepare the carrier and pad contact points
Clean the carrier where the pad ears sit. Corrosion in these spots can stop the pads sliding freely.
Then fit any new abutment clips. If the pad manufacturer or vehicle design calls for lubrication at pad ears or contact points, use a minimal amount of the correct high-temperature synthetic product. Keep it off the friction surfaces.
What works:
Thin film on guide pins
Thin film on approved pad contact points
Fresh clips and shims when supplied
What doesn’t work:
Grease on the pad face
Grease on the disc surface
Heavy blobs that attract dirt
Copper anti-seize where a silicone product is specified
Install the new pads and refit the caliper
Slide the new pads into place. They should fit snugly but move freely in the carrier. If you have to hammer them in, something is wrong. Usually it’s corrosion under the clips or the wrong pads.
Refit the carrier if removed, then lower the caliper over the new pads. Insert the bolts by hand first so you don’t cross-thread them.
Tighten all fasteners to the vehicle’s specified torque. If you’re working from a workshop manual, follow that spec exactly. Torque isn’t fussiness on brakes. It’s part of the repair.
Repeat on the other side
Brake parts on an axle should be replaced in pairs. Don’t do one side only.
Use the second side to compare anything that looked suspicious on the first. If one side has much heavier wear, one pin is dry, or one piston fought you all the way back, that’s useful diagnostic information.
A visual walkthrough can help if you like seeing the sequence before doing it yourself.
Refit the wheel and torque it correctly
Put the wheel back on and hand-thread the wheel bolts or nuts first. Snug them in a star pattern, lower the car, then torque them to the correct specification.
That star pattern matters because it helps the wheel seat evenly against the hub. Uneven tightening can create problems that feel like brake vibration but are not brake faults themselves.
Front and rear brakes aren’t always the same job
The broad process is similar, but rear brakes often add complexity.
A quick comparison helps:
Area | Front brakes | Rear brakes |
Piston movement | Often push-back type | Often wind-back type |
Load in braking | Usually higher | Usually lower |
Parking brake involvement | No | Often integrated |
Common issue | Heat and wear | Seized handbrake mechanism or awkward piston reset |
If the rear caliper includes an electronic parking brake, don’t guess. Some vehicles need service mode before piston retraction. If you’re not certain, stop and check the proper method for that exact car.
Before you drive
Do these checks before moving the car:
Pump the brake pedal until it firms up
Check the fluid reservoir
Look for leaks or anything left loose
Make sure tools are out from under the car
Confirm the wheel bolts are torqued
If you skip the pedal pump, the first press on the road can be a nasty surprise because the pistons haven’t taken up the gap to the new pads yet.
Finishing the Job Bedding-In and Bleeding Your Brakes
A brake job isn’t finished when the wheels go back on. New pads and discs need a controlled start to life, and sometimes the hydraulic system needs attention too.
What bedding-in actually does
Bedding-in transfers an even layer of pad material onto the disc face. That gives you smoother contact, steadier friction, and less chance of noise or uneven deposits.
When people skip it, they often end up chasing complaints that weren’t caused by the parts at all. The brakes may still work, but they won’t work as cleanly or consistently as they should.
A sensible road bedding process is controlled, moderate use. Avoid panic-stop temperatures straight away unless the manufacturer specifies otherwise.
New brakes need heat cycles, not abuse. Give them repeated controlled stops, then time to cool.
A practical bedding routine for most standard road cars
On a quiet road, make a series of moderate stops from normal road speed. Don’t sit stationary with the brake pedal clamped hard immediately after a hot stop if you can avoid it.
What you want is:
Repeated moderate deceleration
A short cooling period between runs if needed
No full emergency stop unless safety demands it
No dragging the brakes continuously downhill
After the first drive, recheck feel and listen for anything unusual. A slight smell from new pads is common. Grinding, heavy pull, or a sinking pedal is not.
EVs and hybrids need a different approach
This is one area where generic brake advice often falls short. With UK EV sales growing 38% year on year, bedding procedures matter because regenerative braking changes how often the friction brakes do meaningful work. Regenerative braking can reduce mechanical pad wear by up to 70%, but it can also lead to squealing if the brakes don’t get a proper bedding cycle of gentle, low-speed stops over 200 miles, as recommended for GSF-supplied Delphi pads (EV bedding-in guidance).
That means the old advice of a few brisk higher-speed stops doesn’t always suit an EV or hybrid. If the car does much of its slowing through regen, the pads may not see enough normal contact early on.
For EV and hybrid owners, the practical takeaway is simple:
Use gentle, repeated low-speed friction braking
Don’t rely on regen alone during the bedding period
Expect the bedding phase to take longer
Follow the pad manufacturer’s guidance if it differs
When bleeding is necessary
A straightforward pad and disc change doesn’t always require brake bleeding. If you never opened the hydraulic system, the reservoir stayed under control, and the pedal is firm after pumping up, you may not need it.
You do need to bleed the brakes if:
The pedal feels spongy
The fluid reservoir ran too low
A hose, caliper, or bleed screw was opened
You suspect air entered the system
If fluid needs topping up or replacing, use the correct brake fluid for the vehicle. Brake fluid specification matters. Mixing the wrong type isn’t a shortcut.
Basic bleeding logic
The goal is to push fluid through the system and remove trapped air. Air compresses. Brake fluid does not in normal operation. That’s why air in the lines gives you a soft pedal.
The simple home method usually needs two people:
Fill the reservoir to the correct level
Attach a clear tube to the bleed nipple
Have one person press the pedal
Open the nipple briefly to release fluid and air
Close it before the pedal comes back up
Repeat until clean fluid with no bubbles appears
Keep the reservoir topped up throughout
Always follow the correct order for your vehicle. If the car has ABS and a more complex bleeding procedure, don’t guess.
Final road check
Your first drive should be close to home and low risk.
Check for:
Straight braking
A firm pedal
No metallic scraping
No warning lights
No strong pull left or right
If something feels wrong, stop and inspect. Fresh brakes should build confidence, not questions.
Troubleshooting and Recognising Signs of Wear
Most brake problems speak early. The trick is listening before they become expensive or unsafe.
According to the Department for Transport, worn brake components contribute to approximately 18% of all reported UK road accidents involving vehicle defects, and brake-related issues account for 12% of all MoT failures (DfT brake safety data). That’s why a brake noise or odd pedal feel deserves attention straight away.
Signs the brakes need attention before you start
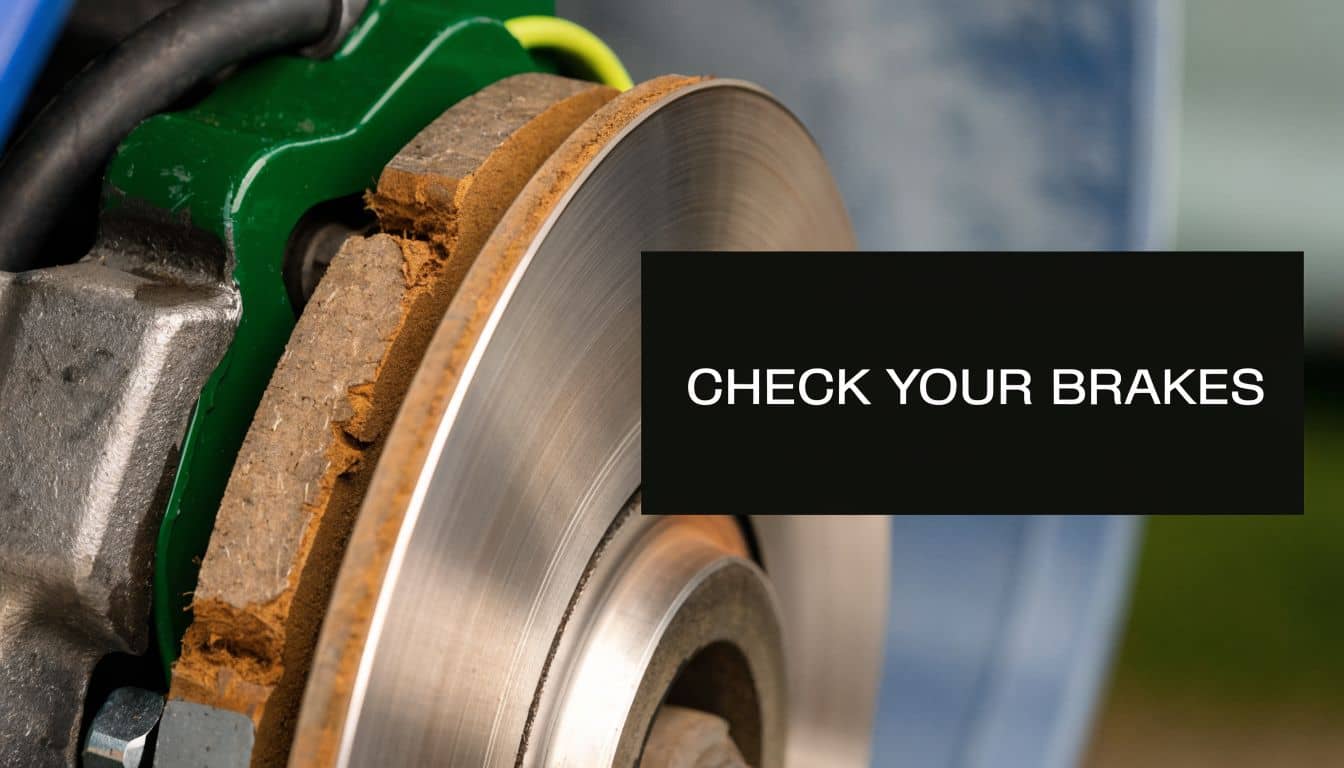
The common warning signs are usually easy to spot:
Squealing when braking often points to worn pads or glazed friction material
Grinding usually means the pad friction material is gone or close to it
Vibration through the pedal or steering can come from disc runout, uneven deposits, or poor mounting
Pulling to one side suggests uneven braking effort
A long or soft pedal points toward hydraulic or caliper issues
Any one of those can justify an inspection. Two or more together usually mean don’t delay.
If the new brakes squeal
Fresh brakes can make some noise during initial bedding, but persistent squeal usually has a cause.
Check these likely faults:
Symptom | Likely cause | What to check |
Light squeal | Missing or misfitted hardware | Clips, shims, pad seating |
Squeal after a few miles | Wrong grease placement or none where specified | Pad ears and guide points |
Noise only on one side | Sticking slider or pad not moving freely | Guide pins and carrier corrosion |
Noise often comes from vibration, not from “bad pads” on their own. That’s why clean contact points and correct hardware matter.
If the pedal feels soft
A soft pedal after pad and disc replacement has a short list of common causes.
Look at these first:
Pistons not fully settled yet. Pump the pedal with the engine off.
Air in the system. Bleeding may be required.
Fluid level issue. Check the reservoir.
Rear caliper not reset correctly. Common on wind-back types.
If the pedal improves after pumping and then goes soft again, stop driving until you find the cause.
A brake pedal should inspire trust on the driveway before the car ever reaches the road.
If you get vibration
Vibration doesn’t always mean a faulty new disc.
In home fitting, the more common causes are:
Rust or debris behind the disc
Uneven wheel tightening
Disc not seated flush on the hub
Pad deposits from poor bedding
That’s why preparation matters so much. A tiny amount of corrosion trapped between hub and disc can create a surprisingly noticeable problem through the pedal.
If one side wears faster than the other
Uneven wear usually points to movement problems.
Check:
Guide pins for stiffness
Pad fit in the carrier
Piston condition
Flexible hose condition if a caliper seems to hold pressure
New pads and discs can hide an old caliper fault for a short while, but they won’t cure it. If the wear pattern was uneven before the job, take that clue seriously.
Frequently Asked Questions About Brake Replacement
Can I just change the pads and leave the discs?
Sometimes, yes. If the discs are smooth, within minimum thickness, and wearing evenly, pads alone can be fine. If the discs are scored, lipped, corroded, or heat-marked, change both together.
How long does the job usually take?
For a first-timer, allow a relaxed half day for one axle. Some cars are simple. Others fight back with rust, seized screws, or awkward rear calipers. Time pressure causes mistakes, so don’t schedule this job like a tyre change.
Do I need a torque wrench?
Yes. Brakes and wheels need correct tightening. “Tight enough” is not a method.
Do I always need to bleed the brakes afterwards?
No. Not if the hydraulic system stayed sealed and the pedal is firm. If the pedal feels spongy, the fluid level dropped too far, or a bleed point was opened, then bleeding is part of the job.
What’s the biggest mistake beginners make?
Rushing the cleaning and piston retraction stages. The old parts come off easily enough. The quality of the finished job comes from the hidden details, especially hub prep, slider condition, proper lubrication, and correct reassembly torque.
Is this job worth doing at home?
If you’ve got the tools, the right parts, and enough patience, yes. It’s one of the best DIY jobs for learning how your car works while keeping control of quality and cost. If the car has an electronic parking brake system or you’re unsure about any step, there’s no shame in stopping and getting model-specific advice before continuing.
If you’re ready to tackle the job properly, GSF Car Parts makes it easier to get the right pads, discs, tools, fluids, and fitting parts for your exact car. Use the number plate finder, check trusted brands like Brembo and Delphi, and get what you need delivered or collected fast so you can do the job once and do it right.





