The lightest scrape with a wall, lamppost or another car can leave a nasty scratch in your car's paintwork, and even the most careful drivers are likely to fall victim to a car scratch at some point. But you don't necessarily need to spend hundreds in a garage to get your pride and joy looking as good as new again.
Can You Fix Scratches on a Car?
Yes! In this guide, we've shared three methods to remove scratches from your car, including quick fixes for light scuffs and more intensive techniques for those deep scratches that cut right through to the metalwork.
Examine the Scratch - How Deep Is Your Scratch?
How to Remove Car Scratches With Toothpaste
Using a Car Scratch Repair Kit 4 Simple Steps
Sand, Polish and Repaint - Repairing a Deep Car Scratch 5 Simple Steps
Car Scratch Guide Know-How
Examine the Scratch - How Deep Is Your Scratch?
Before attempting to remove scratches from your car, you first need to examine the damage to work out how deep it goes. Lighter scratches may be easily treated with a car scratch removal kit, while deeper ones can be harder to fix. They might even need professional repairs, so it's essential to determine how bad the damage actually is.
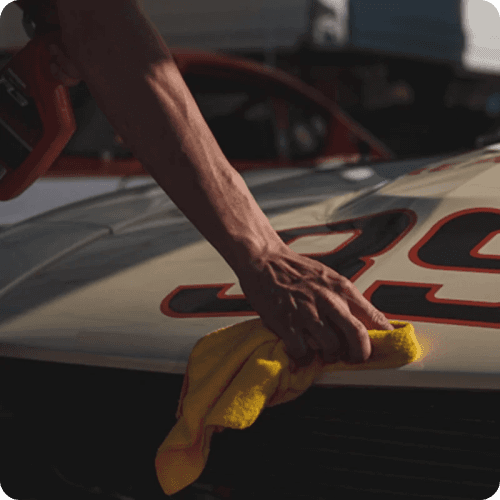
Wash Your Car
Start by giving your car a thorough hand wash. This will remove dirt and grit and let you see the scratches clearly. Be careful when washing the area around the scratch, and don't use any abrasive tools or polishers, as this could worsen the damage. As always, placing a grit guard in the bucket is sensible, as this will stop dirt from getting trapped in your cloth or sponge, which can scratch your paintwork even more.
Check the Scratch
Once the car is clean, you can look closer at the scratch to determine how deep it goes. The paint on your vehicle typically comprises four different layers: metalwork, primer, a colour coat, and a clear coat. A light scratch might only break through the clear coat, but a deeper one might run right down to the metal. The deeper the scratch, the trickier it will be to repair. Here, we've described how you can work how far through the paintwork the damage goes.
Level 1 - A Clear Coat Scratch
A clear coat scratch means that only the topcoat (the clear gloss which protects the paintwork and gives it a shiny finish) is damaged. This sort of scratch will usually be white in colour. It should also feel level with the rest of the paintwork: if your nail doesn't catch on the scratch when you run your finger over it, then it's probably a light clear coat scratch.
With a bit of elbow grease, you can get rid of light scratches on a car using a car scratch repair kit or even a regular tube of toothpaste.
Level 2 - The Scratch Goes Through to the Paint
This kind of scratch goes through the clear coat and into the layer of paint, meaning you'll typically be able to feel a slight ridge with your fingernail. However, it has yet to pass all the way through the layer of paint, which means it hasn't hit the primer or metal. As such, the colour coat is still visible, so while it will require more work than a level 1 scratch, you won't need to touch up the paint completely.
Level 3 - The Scratch Goes Down to the Primer
If the scratch is an off-white colour and strongly ridged, the cut has likely gone through the clear coat and into the primer. It's harder to completely remove this type of scratch, but you can make it much less visible. You'll need to touch it up with some paint for the most effective results.
Level 4 - The Scratch Reaches the Metal Bodywork
When the scratch goes all the way into the metal, it will usually be grey in colour and feel quite deep: you'll likely be able to run your fingernail along the inside of the scratch. With a severe scratch like these, you'll need to touch up the paintwork or even repaint that area of the car altogether. Repair kits or polishing alone are unlikely to fix this kind of damage, so it's a case of filling in the exposed area with paint and buffing it smooth before finishing with a layer of topcoat.
Please note: If your car is dented and scratched, you should note that the methods we've shared below will have no effect. Instead, these will need to be buffed out of the bodywork or repaired using a filler and may even need to be taken to professional repairs.
How to Remove Car Scratches With Toothpaste
If the scratches are only light, then removing car scratches with toothpaste is possible. Toothpaste is a lightly abrasive substance, so when you rub it into the topcoat, it essentially corrodes it lightly, resurfacing the top layer and evens out the surface, removing the scratch.
While toothpaste can be effective on light scratches, it's unsuitable for deeper scratches that penetrate the paintwork. And, as this method strips a bit of the gloss layer away, we wouldn't recommend doing it more than three times. But, if you need a quick, easy fix for some light scratching and want to use products you already have around the house, this might work well for you.
You'll need:
A tube of ordinary toothpaste. Whitening toothpastes are more effective because they have special additives to make them more abrasive.
Two soft cleaning cloths. Microfibre styles work well for this; they are very soft and won't cause further damage.
A hosepipe or a bucket of clean water to wash away the toothpaste.
We recommend carrying out a patch test somewhere inconspicuous before you attempt to tackle the scratch in case the toothpaste has an adverse effect on the paintwork. The inside of the car door is an excellent place to do this, as the paintwork is the same on the exterior but is only visible while the door is open.
Step 1 - Apply the Toothpaste All Over the Scratch
Lightly dampen the cloth and apply a 2cm diameter-sized bead of toothpaste. You may need to use a little more if the scratch is very long or there are multiple scratches.
Step 2 - Buff Gently
Gently buff the toothpaste into the scratched area using small circular movements. Keep going until the toothpaste is evenly distributed. A little pressure will help but don't use too much. Stop after a minute or so.
Step 3 - Rinse and Repeat if Needed
Remove the cloth and rinse the area thoroughly with water to remove the toothpaste before drying it with a clean cloth. The scratch should be gone, but you can repeat the process if it's still visible. We advise against repeating the process more than three times, which may damage the clear coat.
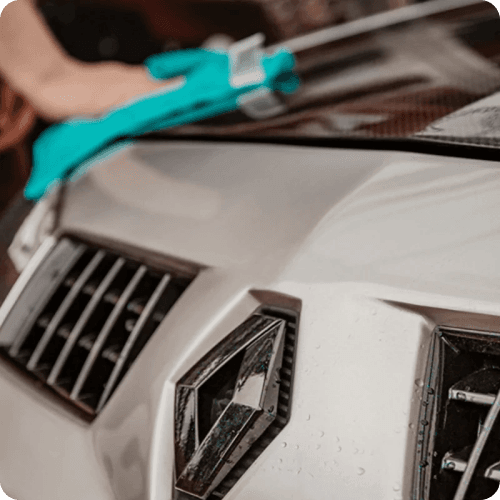
Using a Car Scratch Repair Kit - 4 Simple Steps
There are many car scratch repair kits on the market – this is one we recommed. While there are many variations, they usually contain the same basic elements: a scratch removal solution and a buffing pad to apply the product. Some kits also include sanding or abrasive pads to level the area and potentially a touch pen or topcoat solution, which can be applied to restore shine. Which one you buy will depend on the severity of the scratch: scratch remover fluids tend to be better for lighter scratching.
Different brands will have different instructions, so it's essential to read these carefully and follow them closely. But, generally speaking, the process for most car scratch repair kits will be similar to the one we've given here. You should note that if the scratching is very light, you probably don't need to use the buffing pad provided in some kits, as the scratch removal fluid will be enough.
You'll need:
A couple of soft, clean microfibre cloths.
A scratch repair kit. The instructions may also specify other products you will need, so read these carefully.
Step 1 - Prep the Area
Before you begin, wash the area thoroughly to ensure you don't end up rubbing more grit and dirt into the scratch, and dry it with a clean cloth. Then, read the car scratch fixer kit instructions and check if any buffing tool or abrasive pad is included.
Step 2 - Buff the Area (If Needed)
If the kit contains an abrasive pad to help level the surface, use this according to the manufacturer's instructions. Usually, all you need to do is rub the pad over the surface for a few seconds before seeing if the scratch has started to fade.
Step 3 - Apply the Scratch Removal Agent
Next, apply the recommended amount of scratch removal agent to the buffing tool provided in the kit (or a soft, clean cloth) and rub it gently into the scratched area using gentle circular motions. Ensure that the product is evenly distributed, giving you the best results.
Step 4 - Clean the Area
Leaving the excess product on the car can damage the paintwork, so once you've worked it in enough, take a fresh, clean cloth and remove any residue. Some kits contain a topcoat compound, which you can use to restore the shine and finish.
Sand, Polish and Repaint - Repairing a Deep Car Scratch - 5 Simple Steps
If the scratch is deep, sanding and repainting the area might be your best bet. This strips all the paintwork down to the metal before re-applying primer and paint and then polishing the surface and waxing to add shine and protect the finish.
To remove deep scratches from your car using this method, you'll need:
2000-grit sandpaper and sanding pads. You can sand the paintwork by hand or use an orbital sander.
Spray paint, which is an exact match for your car's paintwork. You can find out exactly what shade you need by contacting your car's manufacturer – if it's a specialist paint, you may need to buy it from them directly. Remember, the paint on older models may not be compatible with modern versions, which have a different chemical makeup, so you may need to buy some from a vintage specialist.
A high-quality automotive primer designed for metal surfaces. Try to find a primer that matches your paint colour closely if you can.
Eye and face protection, including a dust mask.
Masking tape and paper to cover the areas of the car not being painted.
Step 1 - Sand the Paintwork
Sand the scratch and a few inches of the area around it using the sandpaper. If preferred, you can work by hand, using circular motions or an orbital sander. Sand for 10 seconds, then stop and check the area to see if further sanding is required. Stop when the scratch disappears from the paintwork: you may need to sand down to the metalwork if the scratch runs that deep.
Always sand in the direction of the scratch, as this will stop you from accidentally creating new scratches running in the opposite direction, which will mean more repairs.
Step 2 - Prepare the Area for Painting
Once the metalwork is exposed, rinse the area with water to remove any dust and debris left over from sanding. Dry the area carefully using a clean, dry cloth.
Then, create a square around the sanded area using tape and paper to prevent the paint from spreading to areas where it is not wanted.
Step 3 - Prime the Area
Spray the primer onto the sanded area, moving from side to side until the whole area is coated. Then, wait ten minutes for the layer to set before applying another coat. Do this three times to build up a good layer of primer.
Step 4 - Repaint the Primed Area
Spray the paint onto the primed area, leaving the tape and paper in place. You will need to apply more than one layer to get the desired colour. Wait ten minutes between coats to allow it to dry. The manufacturer may have instructions for applying the paint, so be sure to follow these. If you like, you can add a layer of clear coat here for extra shine and protection.
Step 5 - Wax to Restore Shine and Protect the Paintwork
After a few hours, once the paint has thoroughly dried, you can add a layer of wax to add shine and protect the finish. Apply the wax using a clean cloth or buffing pad, following the manufacturer's instructions and using circular motions until the wax is evenly distributed and the paintwork looks brilliant.
Car Scratch Guide Know-How
It's too easy for your paintwork to get scratched out on the road, and even the most careful motorists will likely get caught out at some point. But now you know how to remove scratches from your car at home, you don't need to worry about little scrapes resulting in hefty repair bills. Unless the damage is severe, you should be able to tackle it yourself using one of the methods we've described here.
We have a range of car care products suitable for all sorts of exterior and interior car maintenance and repairs – just click here to see our selection.
Please note that as paintwork can vary between cars, GSF Car Parts can't guarantee that these methods will completely remove the scratch, and we aren't liable for any further damage caused by repair attempts. If you have any other issues with your car, then take a look at our knowledge hub to find more helpful articles like this one.
Shop Car Care Products at GSF Car Parts Online and In-Store
All our car care products are from trusted brands in the motoring industry, so you can count on them to be reliable and of excellent quality. Plus, our low-price promise means you can always expect great value, too.
We offer free UK delivery on all online orders over £25, plus 60-day returns*. We also know you want to get your car up and running as soon as possible, which is why we offer a Click and Collect service that allows you to get your new car care products in just an hour.
So, buy car care products from us with confidence today. Or if you're close to one of our 180 store locations across the UK & Ireland, drop by. Our experienced staff will be able to direct you to the correct part for your vehicle.