Your car headlights are essential to your vehicle's lighting system. As well as illuminating the road ahead for you to see in poor conditions, they're also imperative for signalling to other road users where you are to them on dark roads.
Car Headlight Issues
Although your headlights are protected by sealed housing, they are only partially immune to occasional build-ups of dirt, debris, fogging, and other issues that can reduce their effectiveness. You risk getting into trouble with the police if your headlights do not meet the legal brightness requirements – they must be bright enough to see 100 metres ahead without startling any oncoming cars.
So, you'll need to maintain your headlights often to ensure they work correctly. If you feel that your headlight is broken beyond repair, you can get yourself a new one from our headlight page. Just enter your reg or make and model.
But how do you know when it's time to clean your headlights, and how do you restore them so they’re safe and clean? In this guide, you'll find everything you need to know about restoring your headlights. We'll cover:
Why Should You Clean Your Car Headlights?
When to Clean Your Car Headlights
How to Clean Your Car Headlights
Clean Your Headlights Regularly
Car Headlight Know-How
Why Should You Clean Your Car Headlights?
Your headlights are a critical feature for your car, so it's crucial you keep them in good working order – including cleaning them often.
As well as ensuring you, other road users, and pedestrians are kept safe, headlight restoration means greater visibility if you're driving in poor visibility conditions. It can also help you maintain their functionality and performance, as well as the vehicle's overall value.
When to Clean Your Car Headlights
Like any headlight issue, as they're not easily visible to the driver, it can be challenging to know when your car headlights need cleaning. While they might look a little dirty to the eye, the problem typically starts within the headlight housing and builds up until it's visible from the outside.
Foggy Headlight Problems
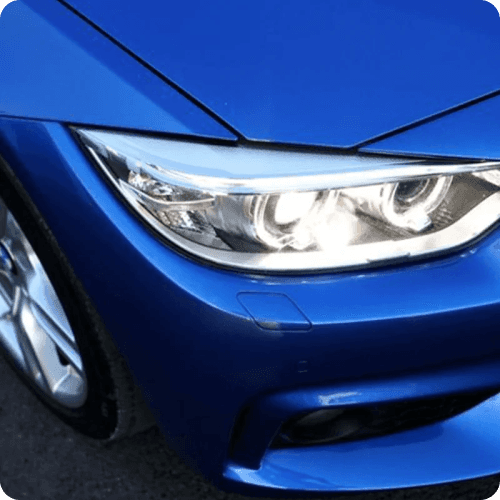
For example, one specific problem that car owners often see is the car headlights becoming foggy, and this is due to chemical reactions between the exposed plastic and the sun's UV rays. So, it's vital to stop this in its tracks to prevent it from getting worse and reduce the brightness of your headlights.
Worn Headlight Sealant
Other problems may arise if the sealant that holds your headlight housing in place has worn away or become loose, as this can mean dirt, dust, and debris from the roads can seep through. In turn, this can cloud up your car headlights and even cause damage to the housing, bulb, and electronics, which may be costly to fix.
Check Them Every Time you Detail Your Car
Generally, it's best to tend to your car headlights every time you clean and detail your car, which might be as often as every two weeks. If you think your headlights stay relatively clean for longer than this, you can go a week or two longer, but you should only leave it for a short time as it can make it harder to spot other, more dangerous issues. This could include engine oil build-ups causing exhaust smoke, car radiator leaks, and many more external and internal problems that will need sorting sooner rather than later.
While frequent cleaning and maintenance can keep your headlights working for longer, if you notice that your headlamps are flickering, seem dimmer, or one is out, it's a sign that you may need to change your car headlights.
How to Clean Your Car Headlights
Most car headlights are made from tough polycarbonate plastic that is ideal for travelling across uneven and rough roads, but it doesn't always deal well with prolonged exposure to the sun. Despite initially having a protective UV film, this eventually wears down and can allow the plastic to oxidise, which is the leading cause of hazy or yellowing headlights.
Before cleaning car headlights, you'll need the following:
Headlight lens UV sealant
A variety of sandpaper with different abrasiveness ratings (e.g. 800, 1000 and 2000 grit)
Multi-surface painter's tape
A bucket of warm water and washing up liquid
Once you've gathered the above, we've found the best way to clean your headlights is to follow the below method:
Clean your car headlights thoroughly with some warm, soapy water and a car sponge – you might also want to wash the surrounding areas so that the painter's tape will stick onto your car well in a minute.
Tape over the bodywork surrounding your headlight cover using the painter's tape. This is so any slip of the hand won't mean you have to remove bodywork scratches.
Wet your headlight and choose the most abrasive sandpaper option available (tip: the lower the number, the more abrasive it is). You should also then wet the sandpaper. You must ensure the headlight is always wet to avoid badly scratching the lens.
Sand the headlight lens in straight horizontal strokes, taking care to only work in one direction first and clean the lens when you see a good proportion of the fogging being removed.
Repeat the above process using the different types of sandpapers you have (gradually getting less and less abrasive). For these next ones, you'll want to sand in the opposite direction to the first time, so we'd recommend working diagonally for the next one, and your last sanding should be in a different direction from the diagonal you just did.
Wipe off any debris and clean your headlights with the soapy water again. Dry them with a microfibre towel.
Add polish to another clean microfibre towel and rub the polish onto your headlights in a circular motion.
When the lenses are clean, you can then add the wax. In our car detailing guide, you can find further information on applying wax to car headlights.
Wet a paper towel and apply your headlight UV sealant in broad strokes. Check the sealant instructions, as some will require one layer, but others may work best with multiple coats.
Allow the sealant to cure by parking your car in a dry space. Once it's dried, finish the job by testing out your restored headlights!
Should you not see the results you wanted, or your headlights are heavily oxidised, it might be worth repeating the process or ordering a replacement headlight lens. You can check our available headlight lenses by clicking here.
Clean Your Headlights Regularly
Keeping your headlights in prime condition is essential for safety and visibility on the roads, so it's always best to avoid letting them get too dirty. However, if you've not spotted how dirty or oxidised they already are, this guide should help restore and clean foggy headlights. You can find all your headlight cleaning essentials on our car care page.
Car Headlight Know-How
Here at GSF Car Parts, we have a range of replacement car parts for you to browse, including bulbs, batteries, and body panels. We even have a great selection of essential cleaning products and tools to help you with DIY car maintenance. Please note GSF does not accept any responsibility for accidental damage caused when following this advice and advises visiting a professional if you don't feel completely confident to carry out this restoration.
If you're planning more repairs on your vehicle, check out our other handy guides that can assist you. We have advice on everything from jump starting your car to checking and changing your brake pads, and even a troubleshooting guide for car starting problems.
Shop Headlights at GSF Car Parts Online and In-Store
All our headlights are from trusted brands in the motoring industry, so you can count on them to be reliable and of excellent quality. Plus, our low-price promise means you can always expect great value, too.
We offer free UK delivery on all online orders over £25, plus 60-day returns*. We also know you want to get your car up and running as soon as possible, which is why we offer a Click and Collect service that allows you to get your new headlights in just an hour.
So, buy headlights from us with confidence today. Or if you're close to one of our 180 store locations across the UK & Ireland, drop by. Our experienced staff will be able to direct you to the correct part for your vehicle.